Automating the deployment of your development environment using Okteto Actions and GitHub Actions.
Nwani Victory works remotely as a software engineer, building scalable and sustainable software. Outside working hours, he doubles as a technical writer, creating technical articles focused on modern web technologies and public cloud providers.
Introduction
GitHub Actions provides developers with the functionality of building and automating the execution of their software development workflows directly in a project’s repository.
In this tutorial you'll learn how you can automate the workflow of an existing Flask API whose continuous integration process is managed using GitHub Actions. You'll learn about the GitHub actions created by Okteto and how you can use them to work with Okteto with a GitHub Action workflow.
Why automate your workflow?
The Okteto CLI does a fantastic job at simplifying the process of working with your Okteto resources. However, over time, executing commands to build and deploy your docker image to the Okteto cloud after major changes could become repetitive and tiring.
According to Google’s SRE practices, a way to eliminate the toil time resulting from such operations is to automate the execution of such commands through the use of a script, or an external automation service.
For this article, we'll be using GitHub Actions as an automation tool to build a docker image from merged code changes and deploy the docker image to the Okteto Cloud using the available Okteto Actions.
Prerequisites
In order to follow along with this tutorial, it's expected that you satisfy the following requirements;
- Have an Okteto Cloud Account.
- Have the Okteto CLI installed on your machine.
- Have a GitHub account with Git installed on your machine.
- Have an understanding of the Python programming language, with an installation of python on your machine.
- Have an installation of Docker on your machine.
Step 1: Clone a sample Python Flask app
To get started, fork the sample application from its repository here. After forking the repository, execute the command below from your terminal to clone your forked copy of the repository to your host machine;
Replace the
GITHUB_USERNAMEin the URL below with your GitHub username to match the remote origin of the forked repository.
$ git clone https://github.com/{{GITHUB_USERNAME}}/okteto-flask-app
In the flaskr.py file, there are three API routes defined for performing a create, retrieve, and delete operation against a connected Couch database.
The cloned project also contains a Dockerfile and docker-compose.yml file that contains all defined steps and services needed to create a multi-stage build for this application.
To run this application, execute the docker-compose command below to build and run the application container that consists of a database and app service.
$ docker-compose up --build
To test the application above, execute the command below from a new terminal window to make a POST request to the /api/customer api route within the flask API using cURL which inserts a new document into the customer collection within the running Couch database through it’s RESTful Apiserver.
$ curl -X POST -d '{"name":"Victory Nwani","occupation":"Software Engineer"}' -H 'Content-Type: application/json' http://localhost:5050/api/customer
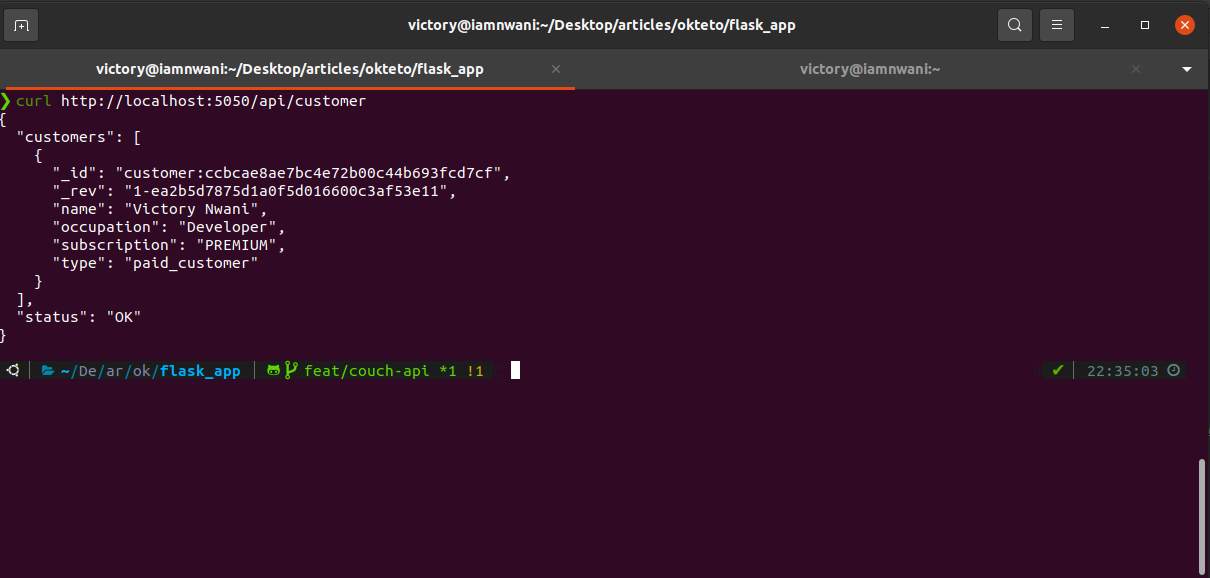
To view the data inserted from the POST request above, execute the command below from your terminal to make a GET request to the /api/customer api route within the flask API using cURL which retrieves all documents in the customer collection within the couch database.
$ curl http://localhost:5050/api/customer`
You can also work with the running couch database through the Fauxton web interface that comes by default with couchdb image at http://localhost:5984/_utils.
As defined in the environment field within the database service in the
docker-compose.ymlfile, the couchdb username is couchdb-admin, while the password is couchdb-password. Feel free to change them to your own preferred secured values.
Step 2: Deploy Flask application To Okteto Cloud
Now that you have the cloned application working locally on your computer, you'll deploy the cloned version to the Okteto cloud to serve as a deployment for your development environment. The folder already contains a Dockerfile and a docker-compose.yml file that defines the services and steps needed to build the image for this application.
To begin the deployment from your terminal using the Okteto CLI, execute the command below to log in and create a session between your Okteto cloud account and your local terminal;
$ okteto context
Next, build a docker image of the entire application using the docker-compose.yml file and deploy it to your Okteto cloud namespace:
$ okteto stack deploy --build
Going through the resources listed in your Okteto cloud account, you would find the deployed application, and the two services specified in the docker-compose.yml file.

Step 3: Write unit tests for the Flask application
One important step within any continuous integration pipeline is to Test new commits made to the code source before a new release is pushed to the continuous deployment pipeline to avoid a regression.
To get started, execute the command below from your terminal to create a new git branch where you would create unit tests for the flask API.
$ git checkout -b feat/ci-pipeline
From your code editor, create a tests directory with a test_flask.py file within the okteto-flask-app project. This file would be used to test the three API endpoints within the flask application. Executing the commands below will create the test file, or you can alternatively use the editor interface to create the file.
$ mkdir tests && cd tests
$ touch test_flaskr.py
All HTTP requests that were to be made to the Couch Apiserver from the API routes were intercepted and mocked in the test suites using the Httpretty package.
Add the test suite in the code block below to test the default route handler that returns a response with some information about the REST API.
import os
from requests import get, post

STAGING_API_ENDPOINT = os.environ.get("STAGING_COUCHDB_URL")

def test_handle_default_route():
 request = get(STAGING_API_ENDPOINT)
 response = request.json()
 assert (response['status'] == "OK")
 assert 'description' in response
The test suite above asserts that a JSON response containing an “OK” status, and description field will be returned each time a request is made to the default route. Looking through the code block, you might have taken note of the STAGING_API_ENDPOINT variable whose value will be gotten from the STAGING_COUCHDB_URL environment variable. The STAGING_COUCHDB_URL environment variable will be set during the continuous flow, and will point to a staging version of the API within an Okteto namespace. You will learn more about this when setting up the GitHub actions flow.
Next, add the code block below into the test_flaskr.py file to test the route POST request handler within the api/customer endpoint by making a POST HTTP verb to insert a new document into the customer collection.
def test_handle_items_post():
    request = post('/api/customer', json={
           'name': 'John Mike',
           'occupation': 'Software Eng'
        })

    responseData = request.json()
    assert responseData['status'] == "USER CREATED"
The test case above asserts that a status field with a USER CREATED value was returned from the POST request to insert a test document into the customer collection. After the test case above is executed successfully, you can rightly expect that a sample document will exist within the customer collection. The next test case will use this sample document to assert that the GET handler is within the api/customer endpoint.
Add the code block below into the test_flaskr.py file to test the route handling all requests made to the api/customer route with a GET HTTP verb to fetch all documents within the customer collection.
import json

def test_handle_items_fetch():

    request = get('{}/api/customer'.format(STAGING_API_ENDPOINT))
    data = request.json()
    assert (data['status'] == 'OK')
    assert 'customers' in data
    assert '_id' in data['customers'][0]
When the test case above is executed, a GET request will be made to the GET handler within api/customer route. The test case will further run assertions against the JSON response to ensure that an OK status field was returned, alongside a list of customers.
At this point we have three test suites to test the three corresponding endpoints exposed within this API.
In the next step where you create the GitHub Action Workflow for this application, you will include a job to run the test suite within the test_flaskr.py file.
Step 4: Create A GitHub Action workflow to automate subsequent deployments
To create a workflow for this application from your computer, create a .github folder with a workflows sub-folder, and a ci.yml file in it.
You can also create an action workflow directly on GitHub from the Actions tab.
Using your code editor, navigate to the recently created ci.yml file and add the code block below to create the initial workflow with the name of “Okteto Flask REST API CI”.
The first step will install Python through the actions/setup-python GitHub Action, and the second step will further install the Python dependencies for the application listed in the requirements.txt file.
name: Okteto Flask REST API CI

on:
  push:
       branches: [ master ]
     pull_request:
       branches: [ master ]

jobs:
  build:
    runs-on: ubuntu-latest
        steps:
       - uses: actions/checkout@v2
       - name: Install python
         uses: actions/setup-python@v2
         with:
           python-version: 3

       - name: Install python dependencies
         run: pip install -r requirements.txt
Next, to begin automating the deployment process of the docker image to okteto, you need to create a personal access token. This token would be used with the okteto-login action to create a session between the workflow build and your namespace. The steps below explain the process of creating an okteto personal access token through your Okteto cloud dashboard.
- From the developer settings section of the settings page within your Okteto dashboard, click the New Token button to generate a new token.
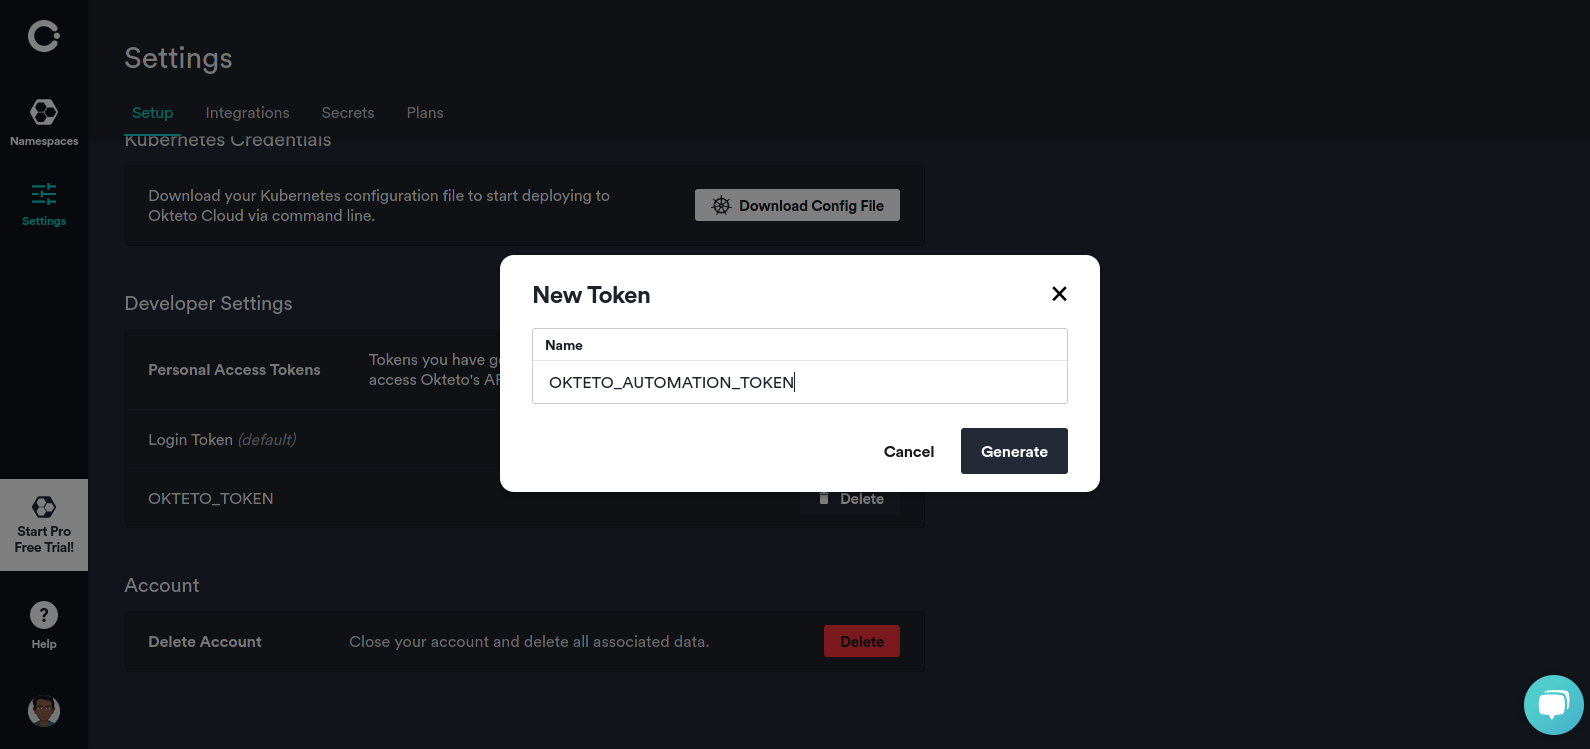
After generating the token above, the token would be displayed to you in the dashboard. You would store it in a GitHub secret next.
If you encounter an error while generating the token, see the Personal Access Token section of the Okteto developer documentation for more in-depth details on how to create a personal access token.
- From the forked repository, navigate to the Settings tab. Click the Secrets column within the left navigation bar, then click on the New Repository Secrets to create a new secret having
OKTETO_TOKENas the secret name and the previously generated okteto token as its value.
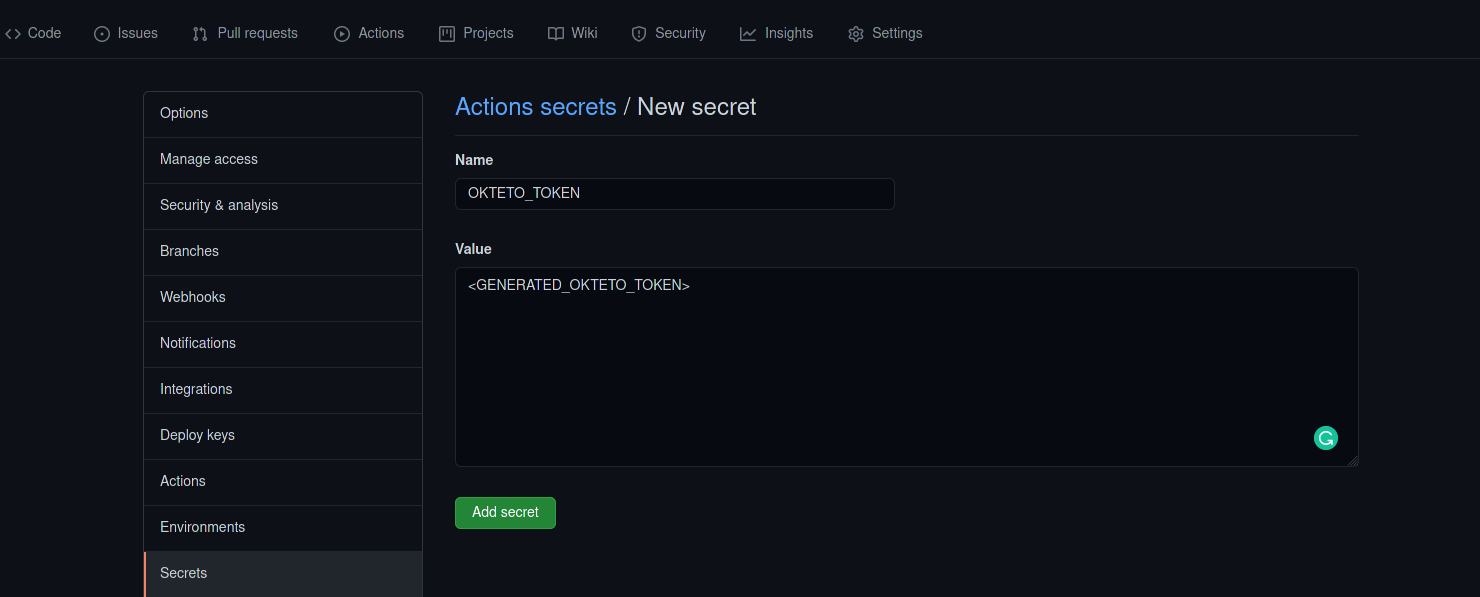
Add the code block below into the ci.yml file. The code block contains a new step that uses the okteto-login action with your okteto personal access token in the step’s environment variables to create a session between your okteto account, and the current workflow build.
- name: Set context to Okteto Cloud
    uses: okteto/context@latest
    with:
    token: ${{ secrets.OKTETO_TOKEN }}
Next, create a staging namespace for a pull request that will trigger this Action workflow using the okteto's deploy-preview action within the step in the code block below, replacing the OKTETO_USERNAME placeholder with your Okteto username.
- name: Deploy your preview environment
      uses: okteto/deploy-preview@latest
      env:
        GITHUB_TOKEN: ${{ secrets.GITHUB_TOKEN }}
      with:
        name: staging-${{ github.event.number }}-OKTETO_USERNAME
        scope: personal
        timeout: 15m
The job above will also deploy the entire stack to the namespace specified in the name field within the with sub-section. Within the next job you'll make reference to this staging deployment.
Next, add a job to check if the entire stack has been deployed before proceeding.
- uses: nev7n/wait_for_response@v1
  with:
    url: https://api-staging-${{ github.event.number }}-okteto_username.cloud.okteto.net
  responseCode: 200
  timeout: 4000
Add the object below into the ci.yml file to run the test suite you created earlier using pytest. The job below will set the STAGING_COUCHDB_URL environment variable to the URL of the deployed stack, and the requests made from the test suite will be made against the staging deployment.
- name: Run API tests agaisnt Staging Namespace
  run: pytest
  env:
    STAGING_COUCHDB_URL: https://api-staging-${{ github.event.number }}-okteto_username.cloud.okteto.net
After adding all the jobs above, ensure your ci.yaml file has the following structure and indentation levels:
name: Okteto Flask REST API CI

on:
push:
branches: [ master ]
pull_request:
branches: [ master ]

jobs:
build:
runs-on: ubuntu-latest
steps:

    - uses: actions/checkout@v2
    - name: Install python
      uses: actions/setup-python@v2
      with:
        python-version: 3

    - name: Install python dependencies
      run: pip install -r requirements.txt

    - name: Set context to Okteto Cloud
      uses: okteto/context@latest
      with:
        token: ${{ secrets.OKTETO_TOKEN }}

    - name: Deploy your preview environment
      uses: okteto/deploy-preview@latest
      env:
        GITHUB_TOKEN: ${{ secrets.GITHUB_TOKEN }}
      with:
        name: staging-${{ github.event.number }}-OKTETO_USERNAME
        scope: personal
        timeout: 15m


    - uses: nev7n/wait_for_response@v1
      with:
        url: https://api-staging-${{ github.event.number }}-okteto_username.cloud.okteto.net
        responseCode: 200
        timeout: 4000

    - name: Run API tests agaisnt Staging Namespace
      run: pytest
      env:
        STAGING_COUCHDB_URL: https://api-staging-${{ github.event.number }}-okteto_username.cloud.okteto.net

    - name: Build and deploy application container to Okteto Flask Namespace
      if: ${{ github.event_name == 'push' }}
      uses: okteto/deploy-stack@master
      with:
        name: okteto-flask-app
        build: true
To test the new GitHub Actions setup, execute the commands below from your terminal to commit and push the changes to your forked repository.
- First, add all the new changes within the flask application:
$ git add .
- Create a local commit containing all added changes with a message:
$ git commit -m "ci: implemented unit tests for api and project ci workflow"
- Push your local commit to your forked copy of the repository:
$ git push -u origin feat/ci-pipeline
- Lastly, create a pull request from the
ci/okteto-actionsbranch, to the project’s master branch in order for the changes to be merged after the actions checks have successfully been completed.
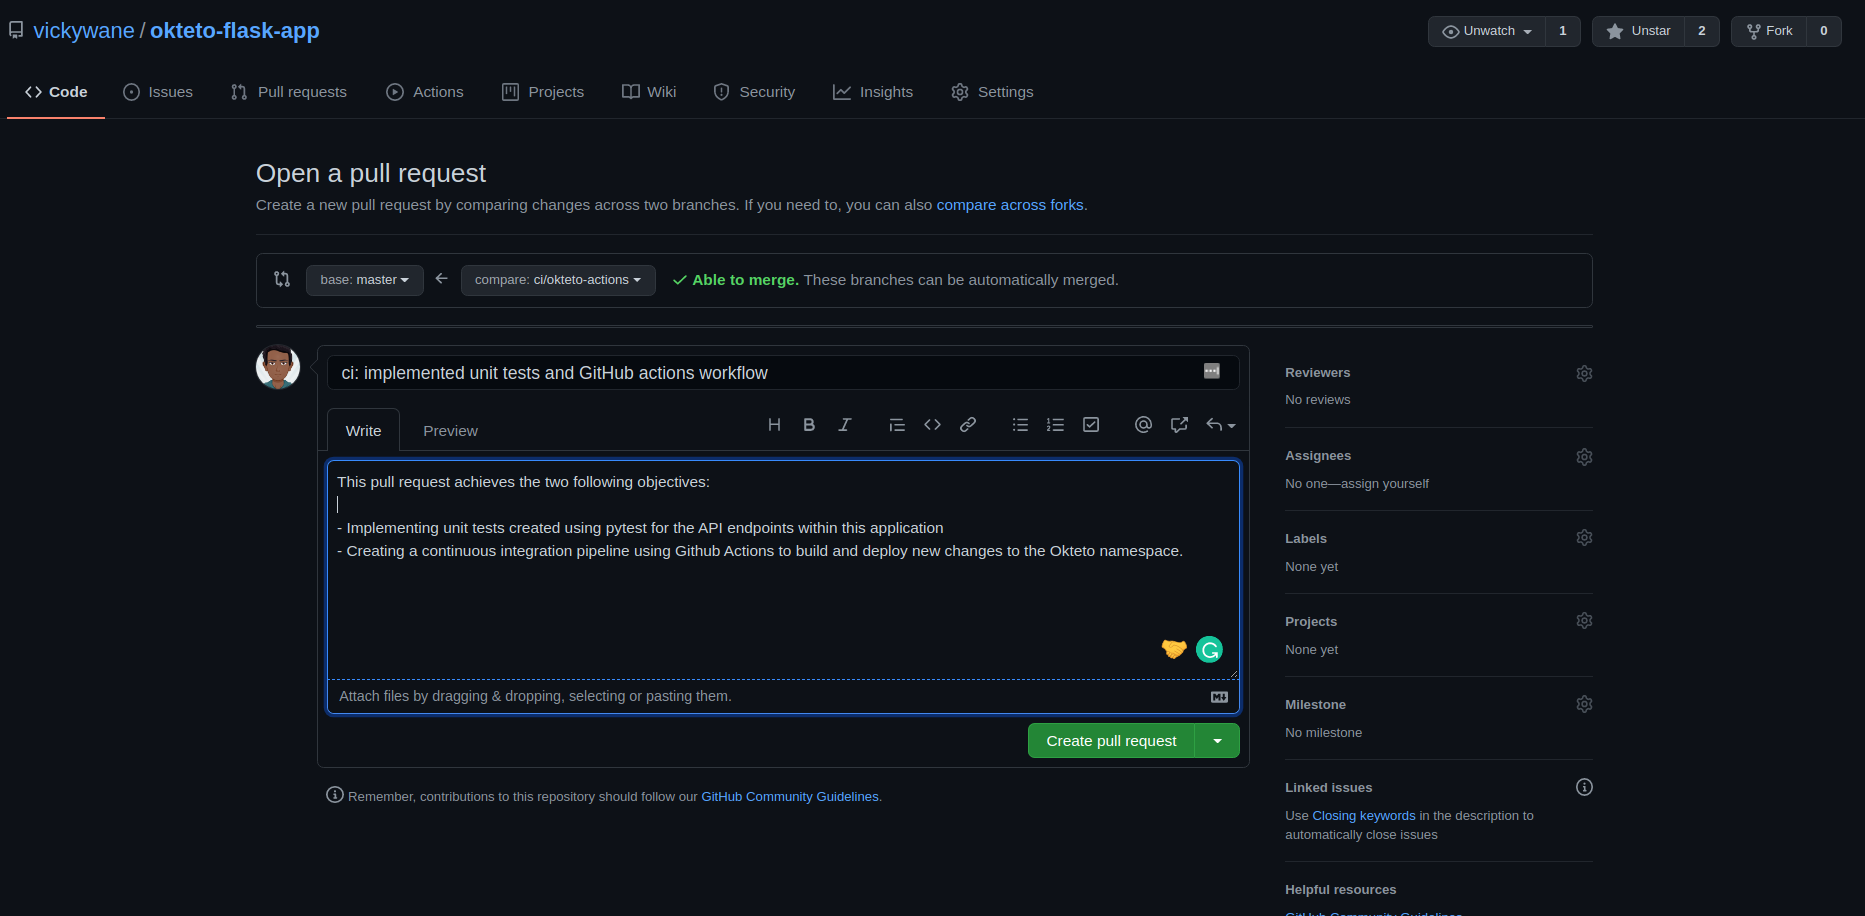
After opening a pull request, the GitHub Actions checks would be triggered and the entire flow in the ci.yml file that includes creating a new build from the changes in the pull request and pushing the built image to the Okteto registry would be executed as shown below;
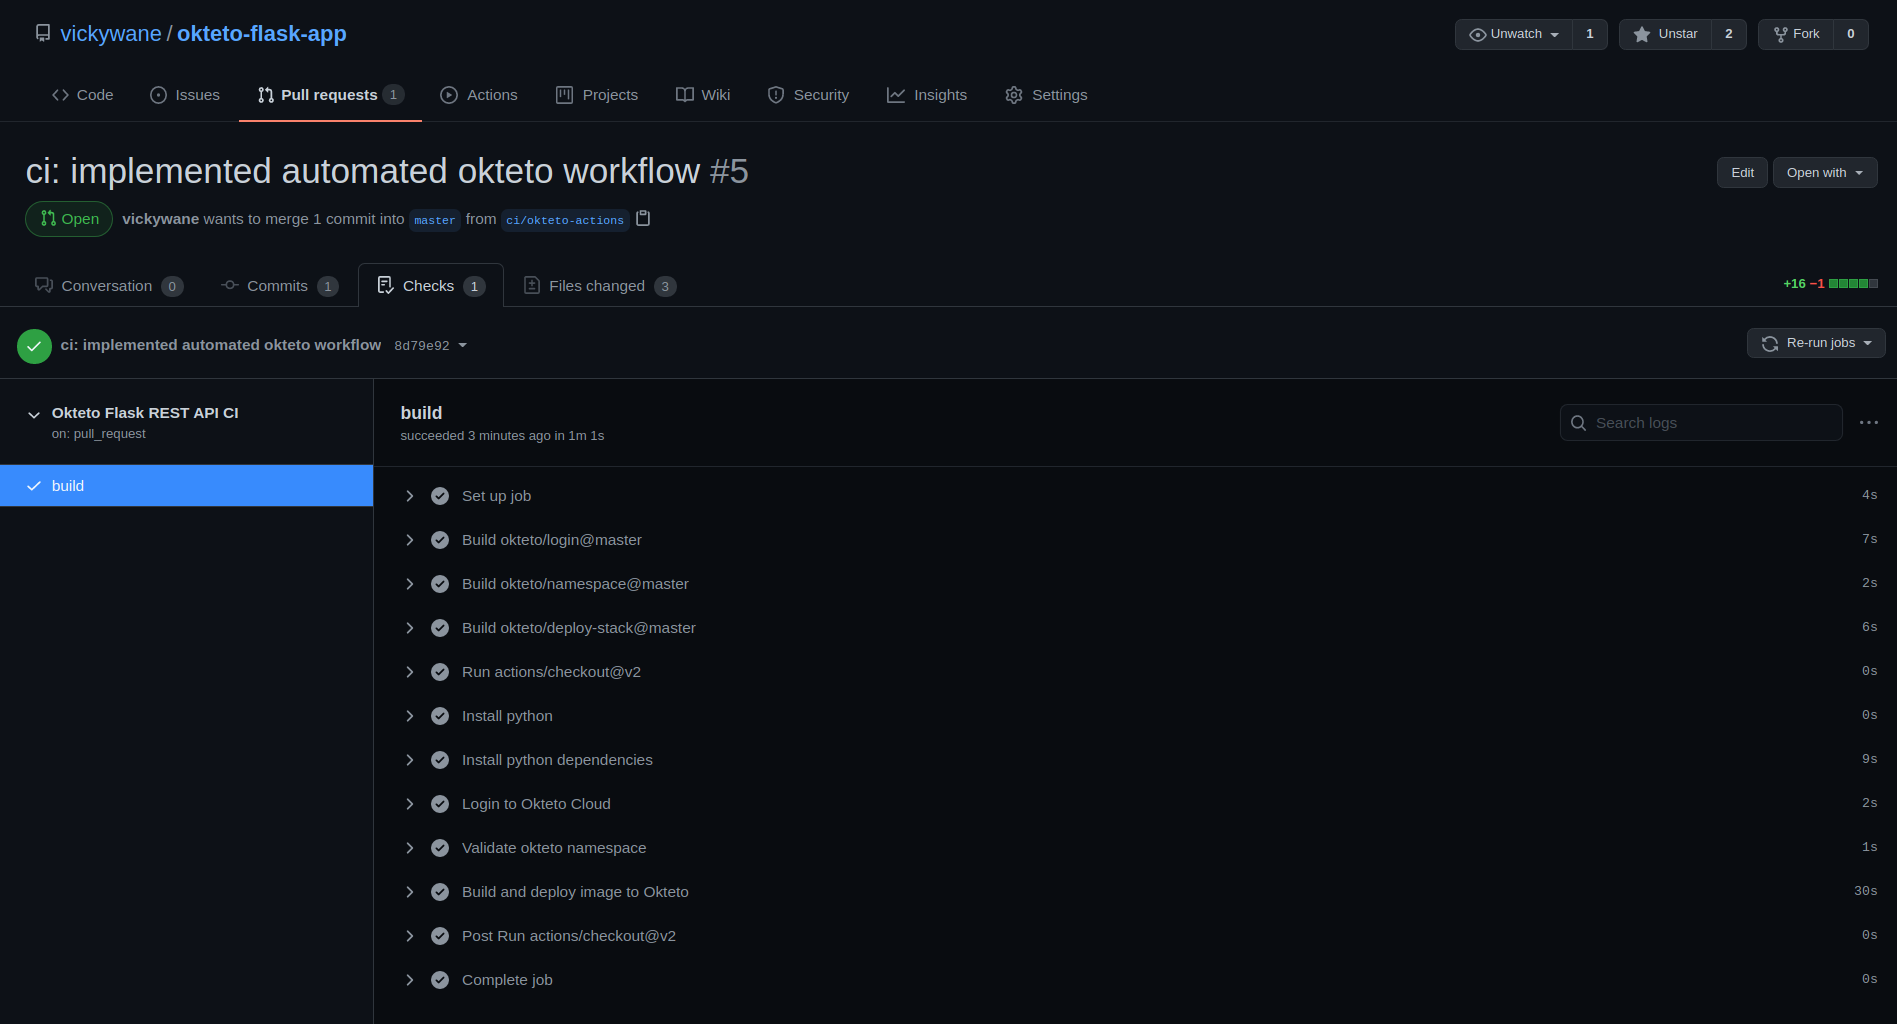
The workflow log above shows that all steps defined in the ci.yml file were executed successfully.
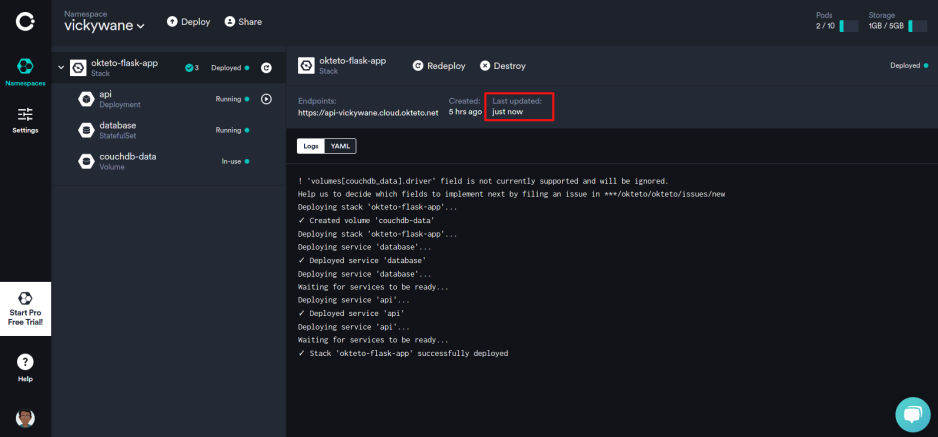
You can further verify that the application image within the namespace was redeployed by checking your Okteto dashboard to see when the last deployment was made.
The highlighted Last Updated section shown in the image below, shows that the entire docker image stack being deployed in this tutorial was redeployed on Okteto after the CI workflow was completed.
Step 5: Restricting automated deployments
With your current GitHub action workflow, all changes in the application pushed to GitHub would cause a redeployment of the application image on Okteto. This is however not an ideal process as a redeployment should only happen after you review and merge the new changes in a pull request.
To make this adjustment, add a if conditional statement into the last “Build and Deploy” step in the ci.yml file that only evaluates to true when the event_name value is “push” indicating that the pull request has been merged, and the checks are being triggered to push the merged changes into the master branch.
 - name: Build and deploy application image to Development Okteto Namespace
   if: ${{ github.event_name == 'push' }}
   uses: okteto/deploy-stack@latest
   with:
    name: okteto-flask-app
    build: true
With the last addition, the entire ci.yml should have the following lines of code below;
name: Okteto Flask REST API CI

on:
  push:
    branches: [ master ]
  pull_request:
    branches: [ master ]

jobs:
  build:
    runs-on: ubuntu-latest
    steps:
    - name: Set context to Okteto Cloud
      uses: okteto/context@latest
      with:
        token: ${{ secrets.OKTETO_TOKEN }}

    - name: Activate application namespace
      uses: okteto/namespace@latest
      with:
        namespace: okteto_username

    - name: Build and deploy application image to Okteto
      if: ${{ github.event_name == 'push' }}
      uses: okteto/deploy-stack@latest
      with:
        name: okteto-flask-app
        build: true
Commit and push the changes to the ci.yml file above to trigger the GitHub actions workflow for the pull request.
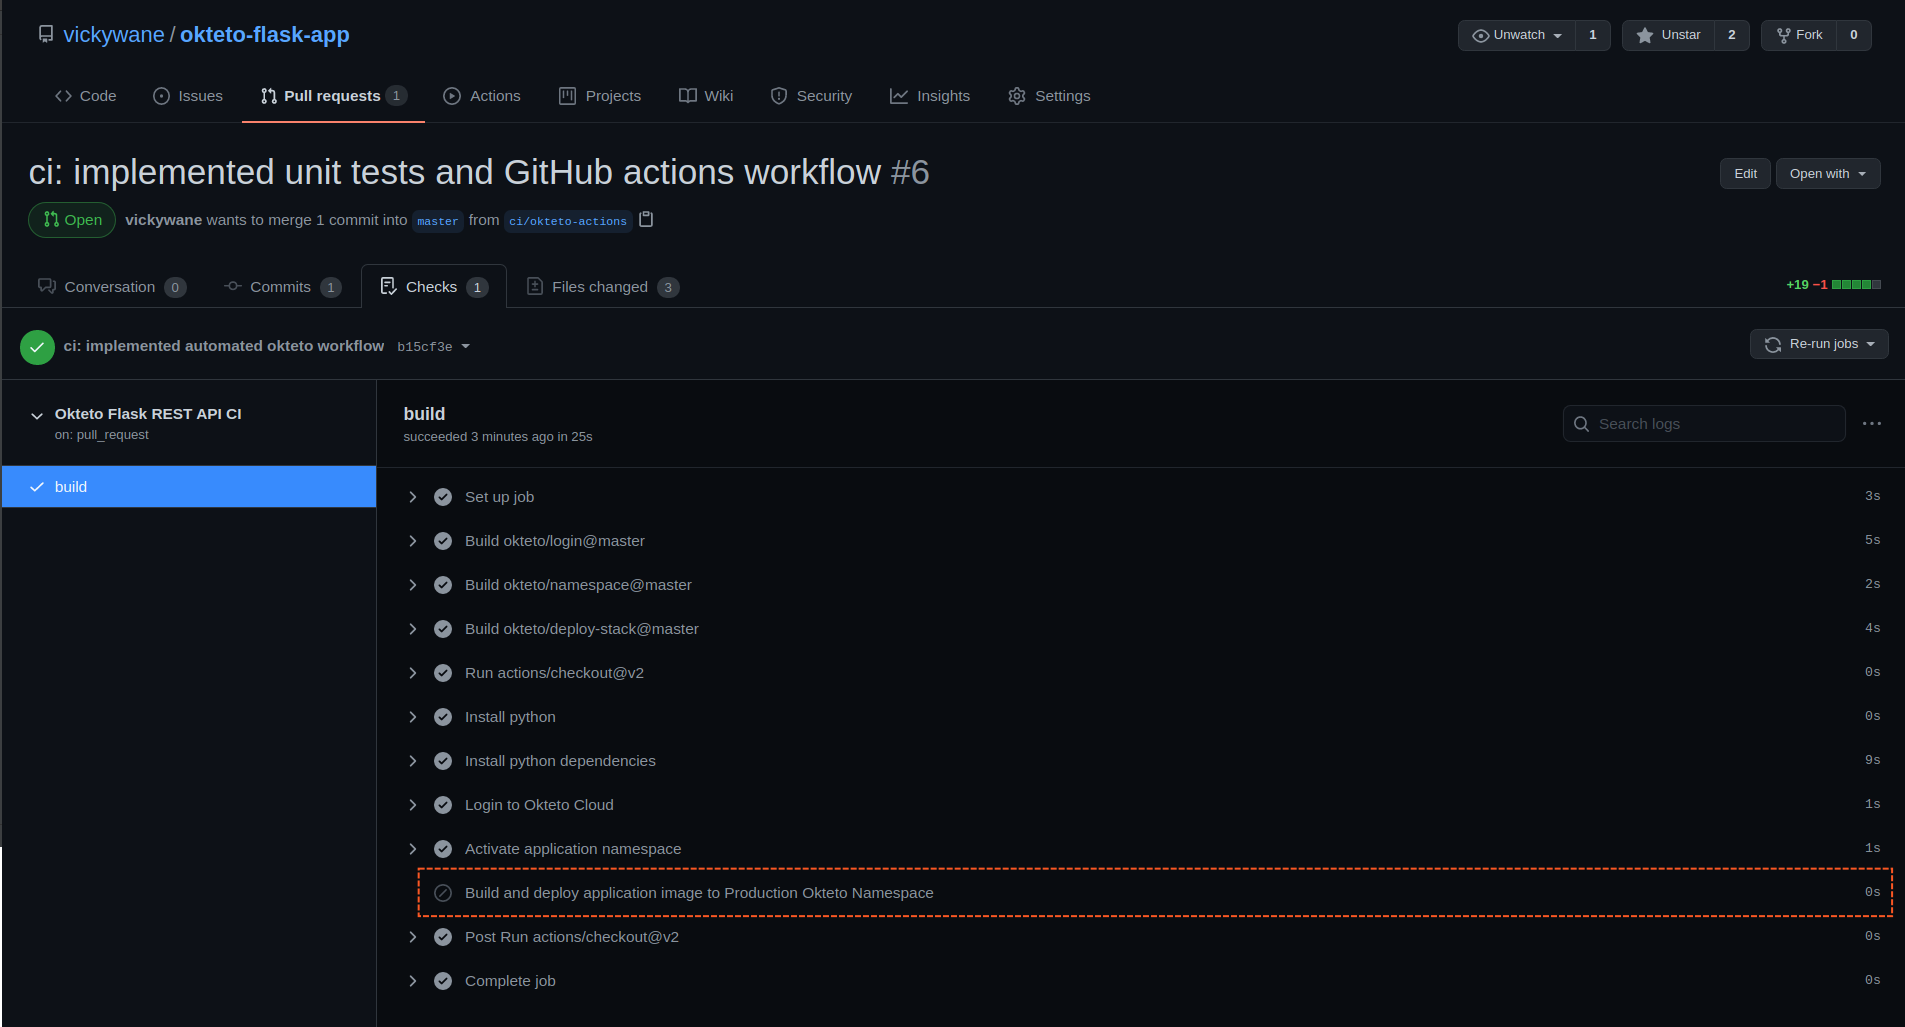
Going through the workflow logs shown in the image below, you would notice that the highlighted “Build and deploy application image to Development Okteto Namespace” step in the build workflow was not executed as expected.
When working with pull requests for your project managed with Okteto, you should set up a preview deployment workflow. This tutorial explains the process of creating a preview deployment workflow for Docker compose applications.
Review and merge the changes within the pull request to trigger the GitHub Actions workflow directly against the master branch, this time executing the "Build and deploy" step to redeploy the image on Okteto.
You can view the Workflow build triggered by the merge from the Actions tab in the repository.

From the image above, you can observe that the build was successful, and it was triggered by a push event to the master branch which was automatically triggered by GitHub when you merged the pull request. This push event would further cause the if condition in the “Build and deploy” step to evaluate to true and execute the step.
All subsequent commits and pull requests would go through this workflow build process, automatically deploying new changes to your Okteto namespace after new changes have been merged into your master branch.
Conclusion
In this article you cloned a sample python application, built and deployed a docker image of the application to the Okteto cloud, then you automated the testing and deployment of your application’s docker image to your cloud Okteto namespace using a GitHub Action workflow.
As suggested within the article, you can set up a deployment preview workflow to create a preview separately for each pull request opened in your project’s repository. This tutorial explains the process of creating a preview deployment workflow for Docker compose applications.
The completed application is available on GitHub and can be found in this repository, for you to clone and use.

 Arsh Sharma