Getting Started with Okteto and ASP.NET
Okteto is a platform that simplifies the process of launching cloud development environments without requiring the expertise to do this yourself. This enables developers to automatically spin up fully-managed development environments that emulate production as closely as possible. Okteto eliminates the friction of local development environments, the many deviations that can exist for the same engineering organization, and the troubleshooting that comes with them.
This tutorial will show you how to develop and debug an ASP.NET application using Okteto.
Prerequisites
Install the latest version of the Okteto CLI and configure it to access Okteto. Follow our installation guide if you haven't done it yet.
Step 1: Deploy the ASP.NET Sample App
Get a local version of the ASP.NET Sample App by executing the following commands:
$ git clone https://github.com/okteto/aspnetcore-getting-started
$ cd aspnetcore-getting-started
At the root of the directory, you'll find the okteto.yml file. This file describes how to deploy the ASP.NET Sample App.
deploy:
  - kubectl apply -f k8s.yml
Deploy your development environment by executing:
$ okteto deploy
 i  Using cindy @ okteto.example.com as context
 i  Running kubectl apply -f k8s.yml
deployment.apps/hello-world created
service/hello-world created
ingress.networking.k8s.io/hello-world created
 ✓  Development environment 'aspnet-getting-started' successfully deployed
 i  Run 'okteto up' to activate your development container
Open your browser and go to the URL of the application. You can get the URL by logging into your Okteto instance (e.g https://okteto.example.com) and clicking on the application's endpoint:
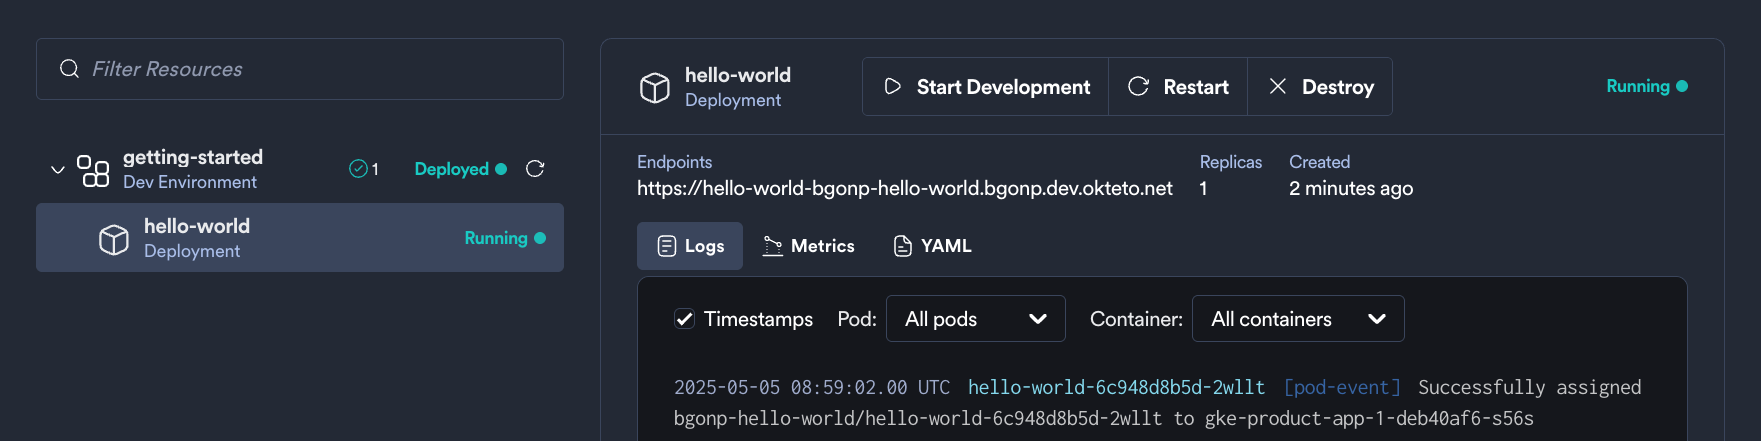
Did you notice that you're accessing your application through an HTTPs endpoint? This is because Okteto will automatically create them for you when you deploy your application. Cool no 😎?
Step 2: Activate your development container
The dev section defines how to activate a development container for the ASP.NET Sample App:
dev:
  hello-world:
    image: ghcr.io/okteto/aspnetcore-getting-started:dev
    command: bash
    environment:
      - ASPNETCORE_ENVIRONMENT=Development
    remote: 2222
    sync:
      - hello-world:/src
The hello-world key matches the name of the hello world Deployment. The meaning of the rest of fields is:
image: the image used by the development container (built from this Dockerfile).command: the start command of the development container.environment: the environment variables added or overwritten in your development container.remote: the local port to use for SSH communication with your development environment.sync: the folders that will be synchronized between your local machine and the development container.
Also, note that there is a .stignore file under the sync folder to indicate which files shouldn't be synchronized to your development container.
This is useful to avoid synchronizing binaries, build artifacts, or git metadata.
Next, execute the following command to activate your development container:
$ okteto up
 ✓  Persistent volume successfully attached
 ✓  Images successfully pulled
 ✓  Files synchronized
    Namespace: cindy
    Name:      hello-world

Welcome to your development container. Happy coding!
cindy:hello-world src>
Working in your development container is the same as working on your local machine. Start the application by running the following command:
cindy:hello-world src> dotnet watch run
dotnet watch ⌚ Polling file watcher is enabled
dotnet watch 🔥 Hot reload enabled. For a list of supported edits, see https://aka.ms/dotnet/hot-reload.
  💡 Press "Ctrl + R" to restart.
dotnet watch 🔧 Building...
  Determining projects to restore...
  All projects are up-to-date for restore.
  helloworld -> /src/bin/Debug/netcoreapp8.0/helloworld.dll
dotnet watch 🚀 Started
warn: Microsoft.AspNetCore.Server.Kestrel[0]
      Overriding address(es) 'https://localhost:5001, http://localhost:5000'. Binding to endpoints defined via IConfiguration and/or UseKestrel() instead.
info: Microsoft.Hosting.Lifetime[14]
      Now listening on: http://0.0.0.0:5000
dotnet watch 🌐 Unable to launch the browser. Navigate to http://0.0.0.0:5000
info: Microsoft.Hosting.Lifetime[0]
      Application started. Press Ctrl+C to shut down.
info: Microsoft.Hosting.Lifetime[0]
      Hosting environment: Development
info: Microsoft.Hosting.Lifetime[0]
      Content root path: /src
Go back to the browser and reload the page to test that your application is running.
Step 3: Remote Development with Okteto
Open the file hello-world/Controllers/HelloWorldController.cs in your favorite local IDE and modify the response message on line 25 to be Hello world from Okteto!. Save your changes.
        [HttpGet]
        public string Get()
        {
             return "Hello world from Okteto!";
        }
Take a look at the development container shell and notice how the changes are detected by dotnet watch run and automatically built and reloaded.
info: Microsoft.Hosting.Lifetime[0]
      Application is shutting down...
watch : Exited
watch : File changed: /src/Controllers/HelloWorldController.cs
watch : Started
info: Microsoft.Hosting.Lifetime[0]
      Now listening on: http://0.0.0.0:5000
info: Microsoft.Hosting.Lifetime[0]
      Application started. Press Ctrl+C to shut down.
info: Microsoft.Hosting.Lifetime[0]
      Hosting environment: Development
info: Microsoft.Hosting.Lifetime[0]
            Content root path: /src
Go back to the browser and reload the page. Your code changes were instantly applied. No commit, build, or push required 😎!
Step 4: Remote debugging with Okteto
Okteto enables you to debug your applications directly from your favorite IDE. Let's take a look at how that works in VS Code using the VS dotnet debugger.
For this step, we're going to use the C# extension for VS Code. If you don't have it, you can install it here. You might need to restart your VS Code instance.
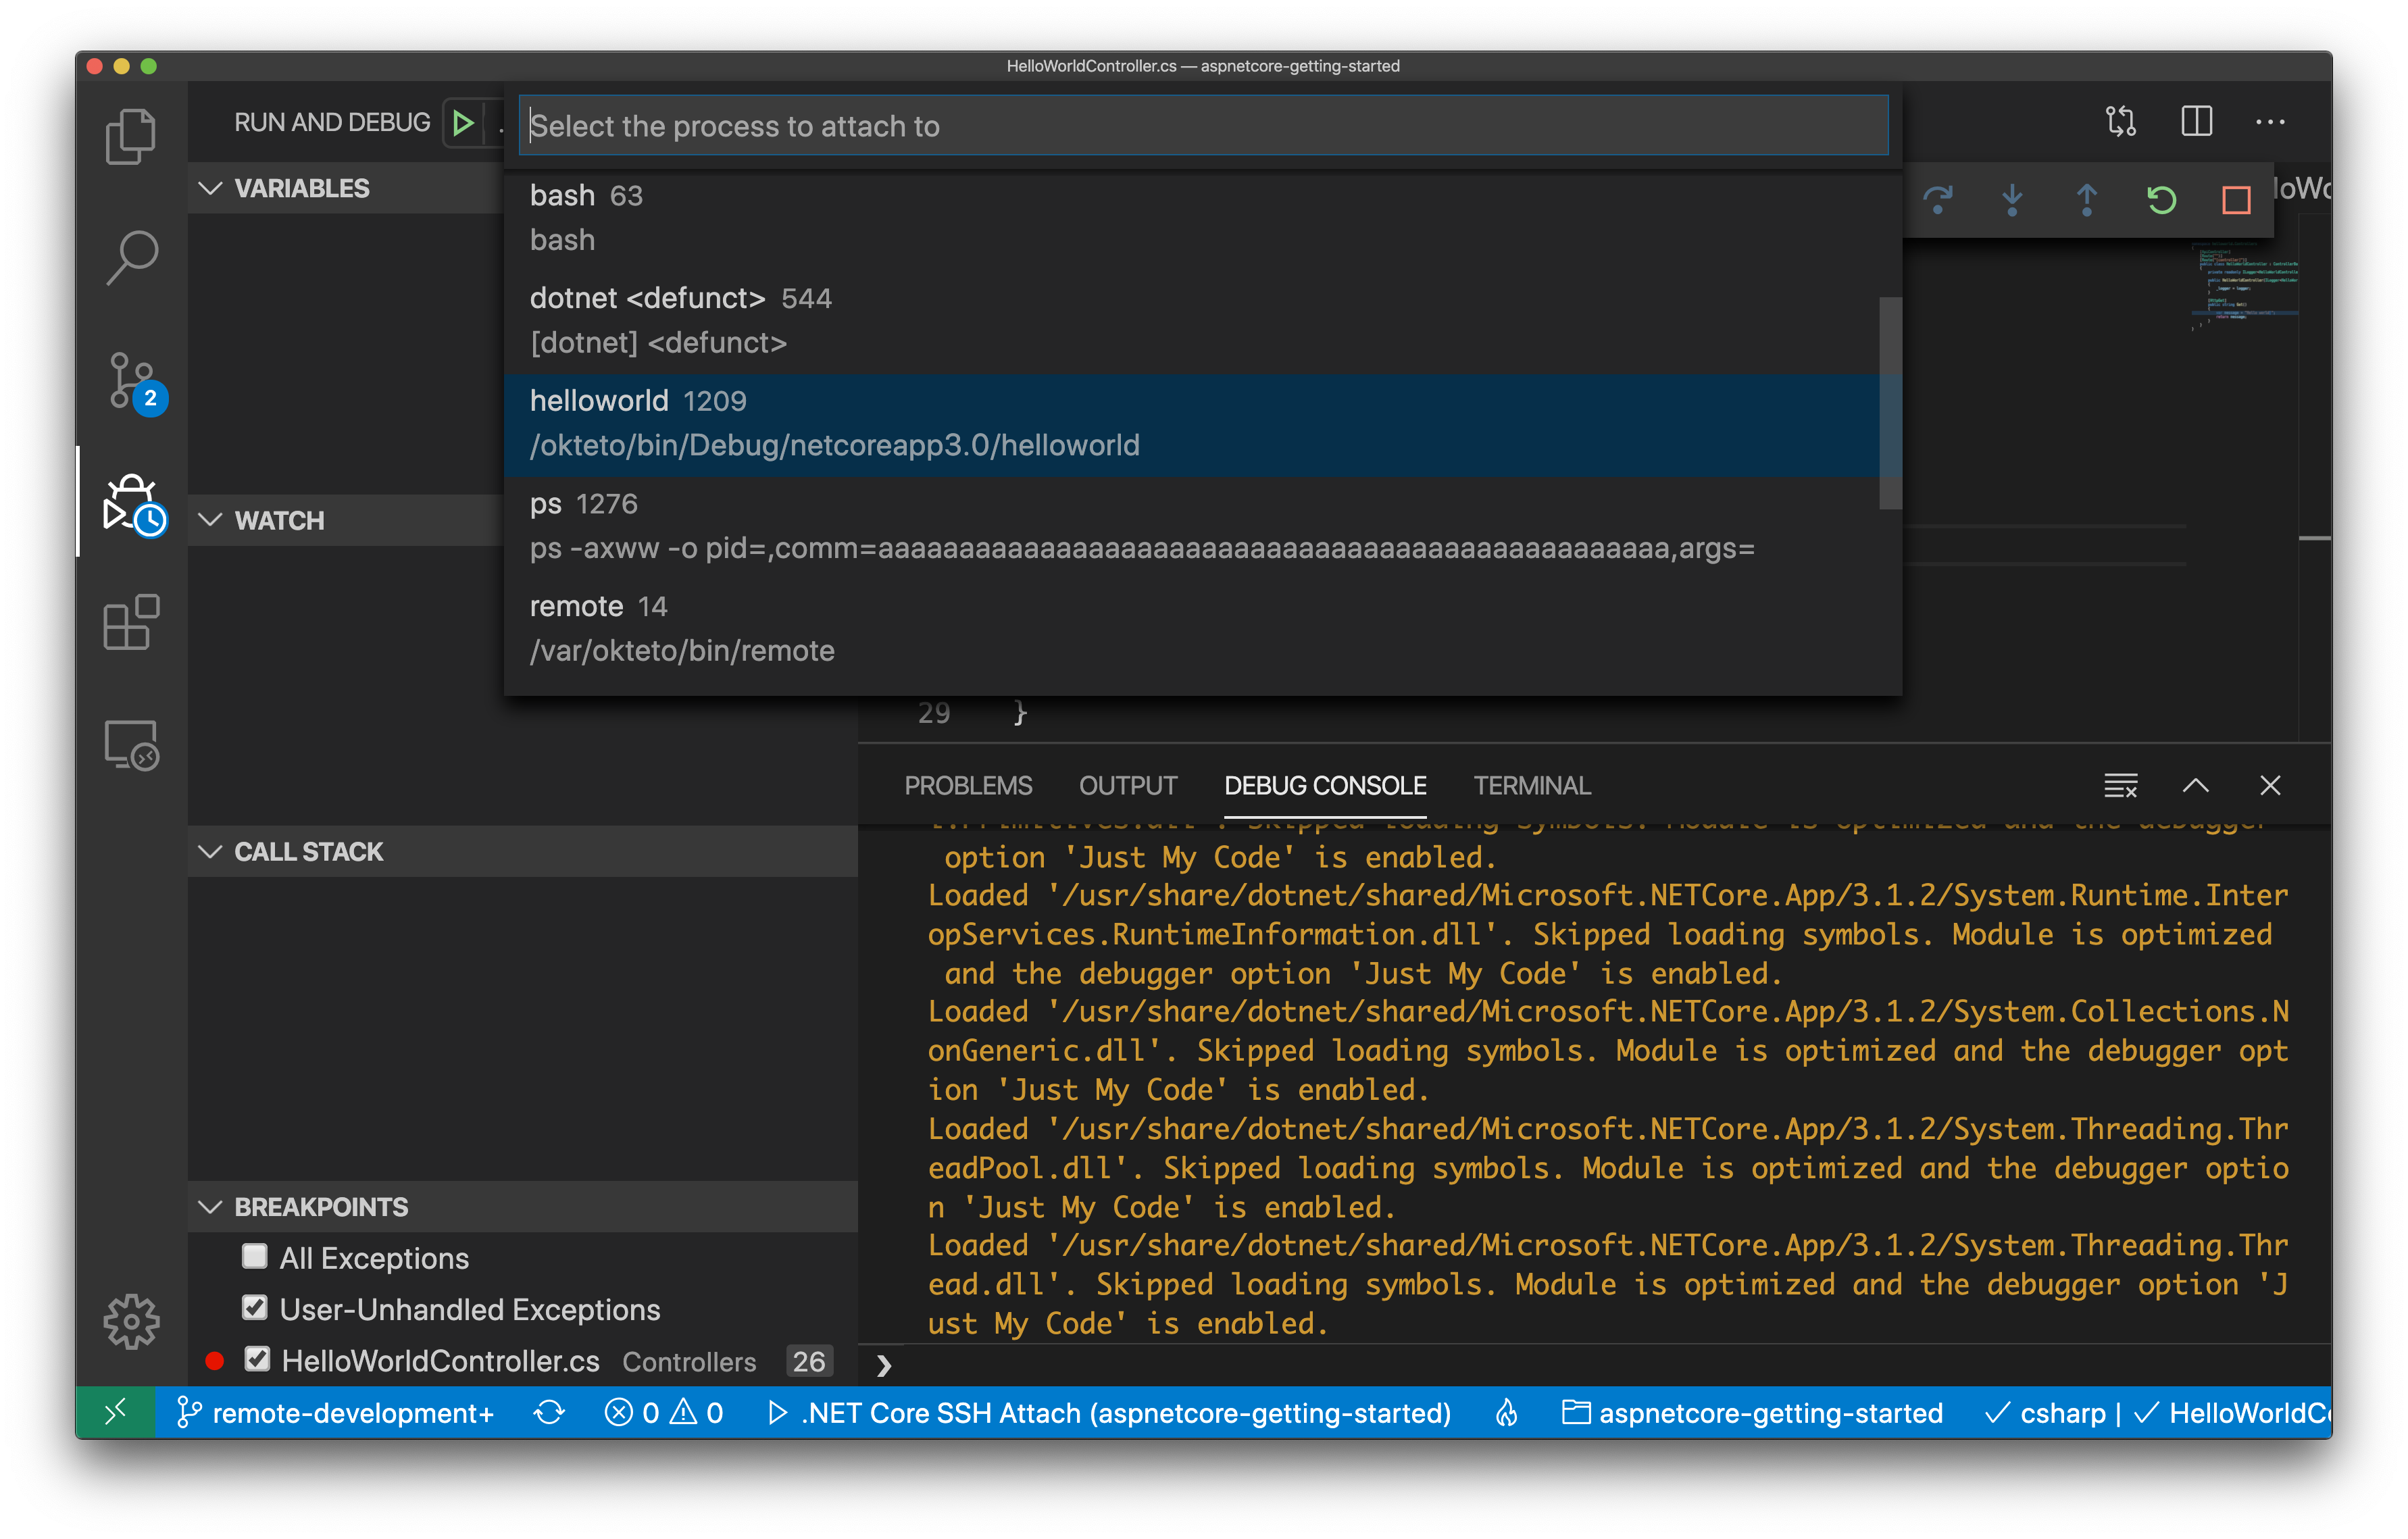
Open HelloWorldController.cs in VS Code, set a breakpoint on line 26 and press F5. VS Code will connect to your development container via SSH and give you a list of processes you can attach to. Scroll through the list and select the helloworld process, as shown below (you can also type helloworld in the search bar directly).
Once you select the process, VS Code will switch to debug view, launch the debugger, and attach it to the process you just selected. You'll know it's finished when the status bar at the bottom turns orange.

Go back to the browser and reload the page. As soon as the service receives the request, the execution will halt at your breakpoint and VS Code will jump to the front of the screen. You can then inspect the request, the available variables, etc.
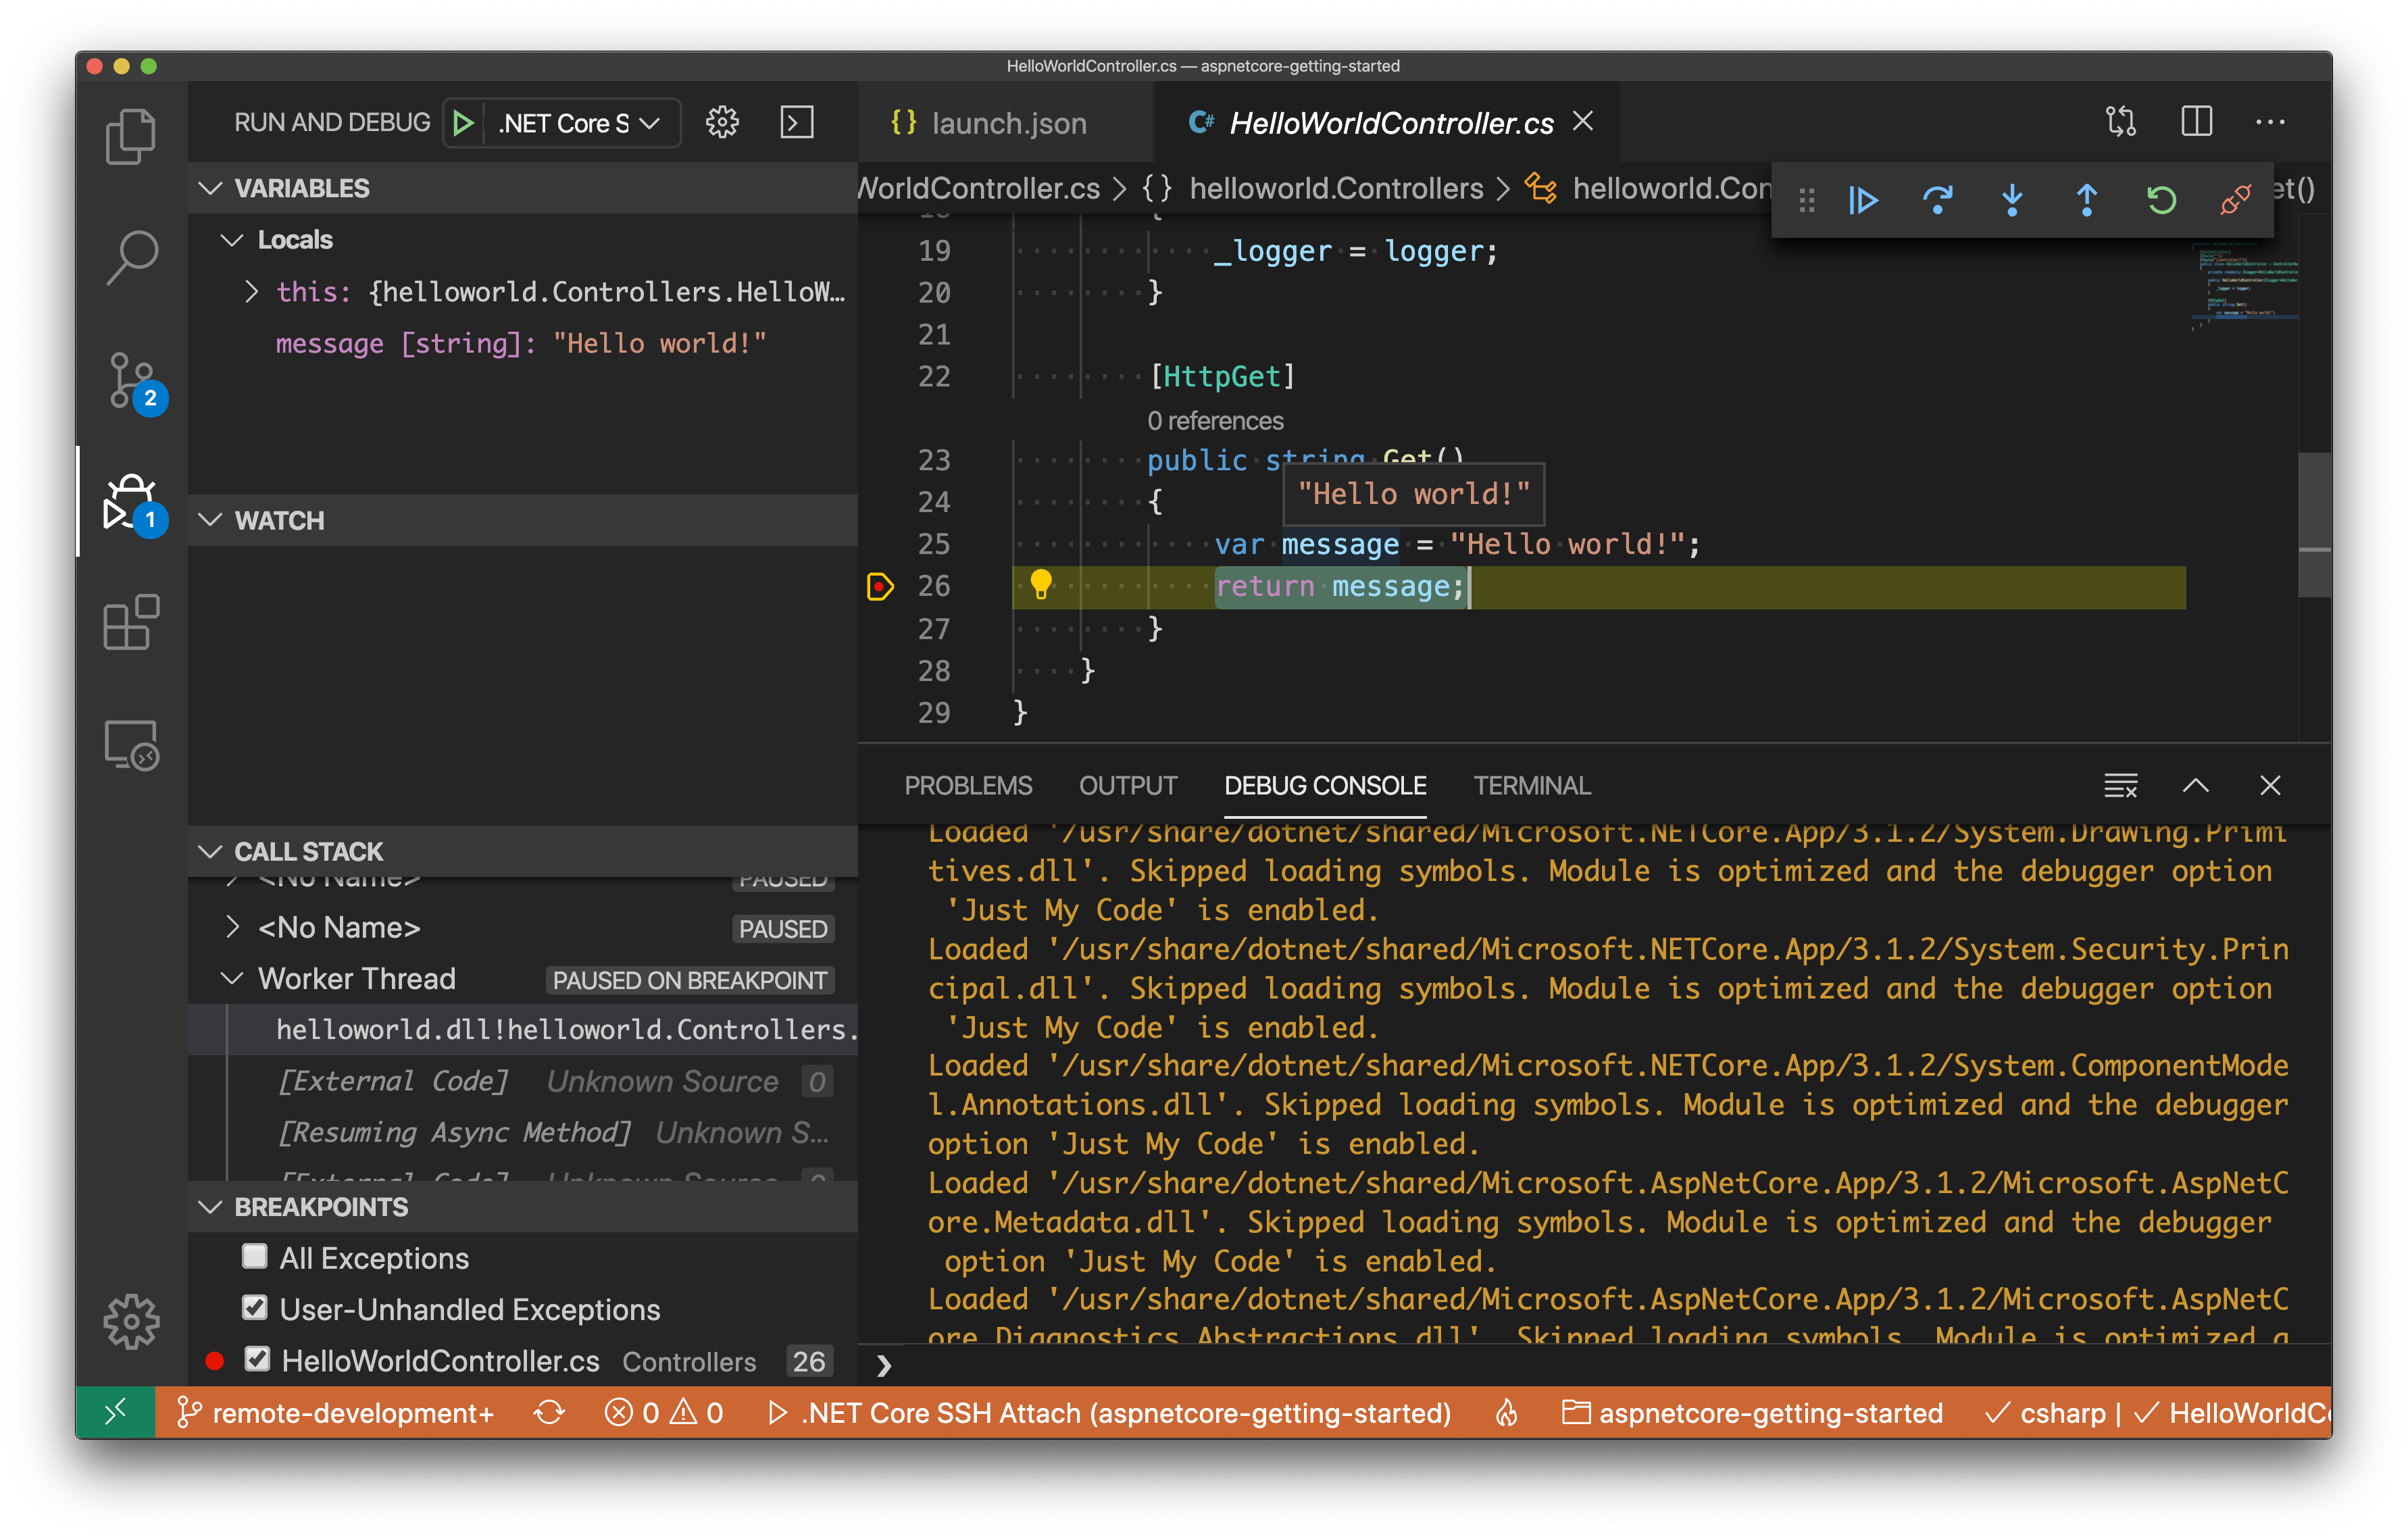
Your code is executing in Okteto, but you can debug it from your local machine without any extra services or tools. Pretty cool no? 😉
Next steps
Congratulations, you just developed your first application in Okteto 🚀.
Okteto lets you develop your applications directly on Kubernetes. This way you can:
- Eliminate integration issues by developing in a realistic environment
- Test your application end to end as fast as you type code
- No more CPU cycles wasted in your machine. Develop at the speed of the cloud!
Find more advanced samples with Okteto in this repository or join our community to ask questions and share your feedback.