Okteto Cloud meets GitOps

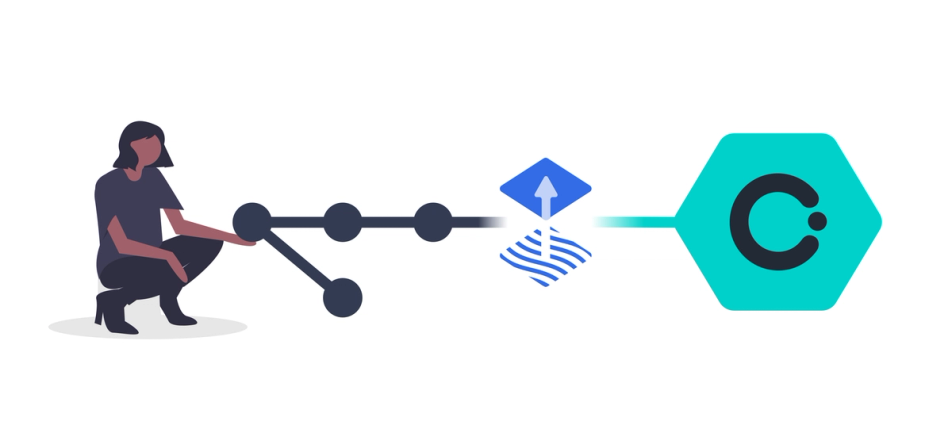
GitOps is the new way to deliver applications in Kubernetes. It uses Git as a single source of truth for your applications, automating delivery by using the standard git pull request workflow that developers already love. In Kubernetes, Flux is the dominant tool. It runs an operator in Kubernetes to update your applications every time you push to your git repository or a new docker image is available.
Okteto loves GitOps because it empowers developers to own the delivery process, but using self-service automation to test, deploy, and observe their applications in production. We are happy to announce that Flux has been added to the official Okteto Cloud Application Catalog to provide a one-click Flux deployment experience.
Follow the rest of this post to learn how to setup your own Gitops pipeline with Okteto Cloud and Flux.
Getting Started with Flux on Okteto Cloud
In this tutorial, we'll show you how to create a GitOps pipeline that automatically deploys and updates an application in Okteto Cloud. For demo purposes, we'll be using this sample application. Start by forking the repository on GitHub.
The sample application is packaged using Helm Releases. Check the official Flux guides if you want to use raw Kubernetes Manifests or Kustomize.
Creating a Gitops pipeline for this application requires performing the following steps:
- Deploy Flux from the Okteto Cloud Application Catalog.
- Give Flux write access to your repository.
- Commit a small change.
- Automated deployment of new container images.
Deploy Flux from the Okteto Cloud Application Catalog
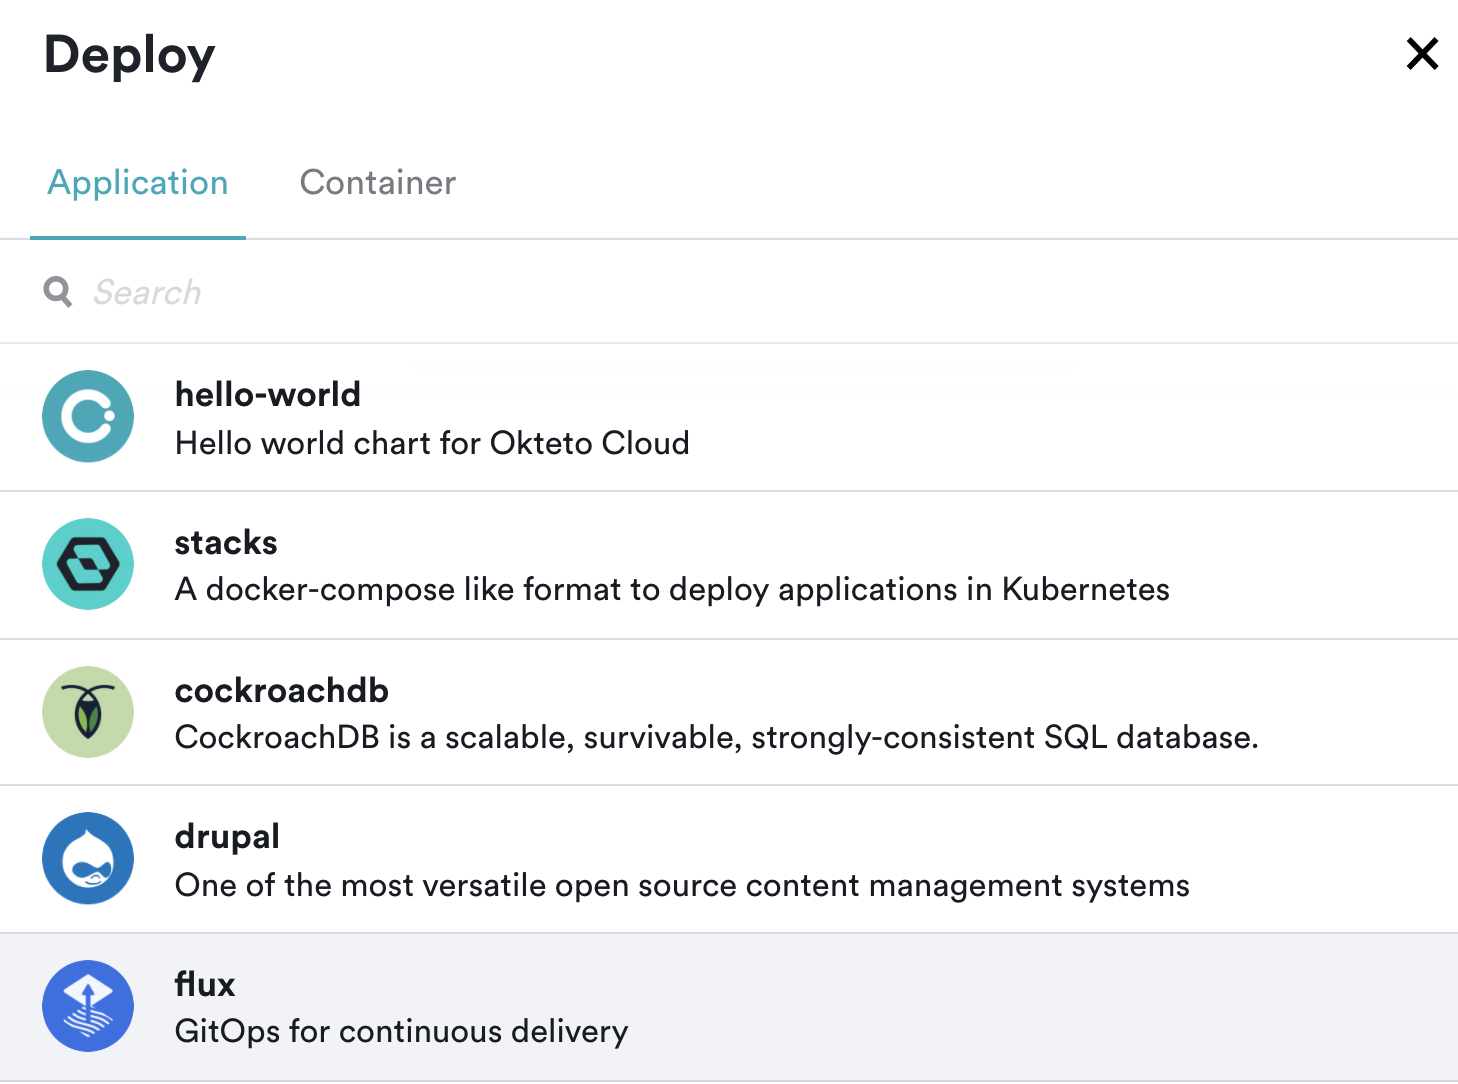
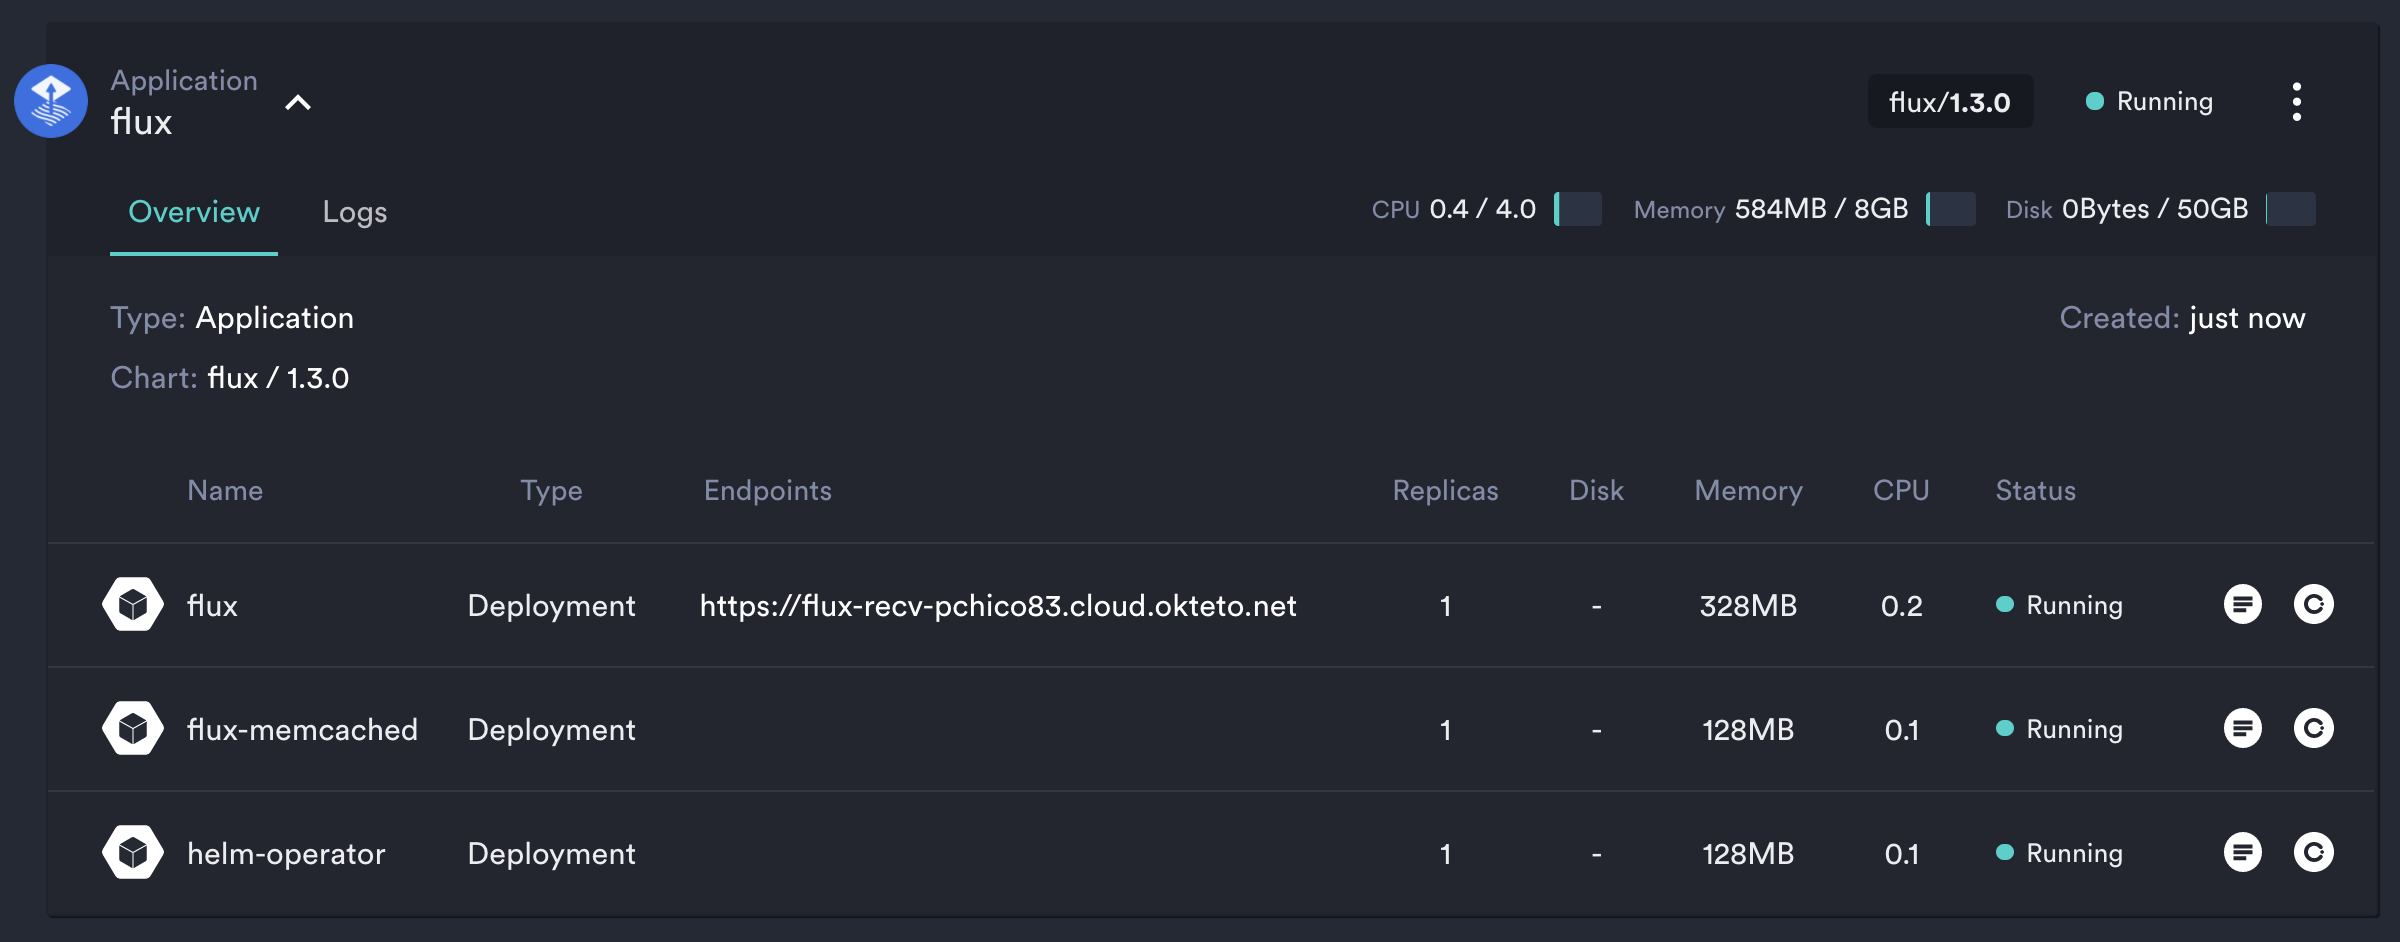
Log into Okteto Cloud and click on the Deploy button on the top left. Switch the deploy method to Deploy from Helm Chart. A dialog will open with the list of available applications you can deploy on your namespace. The list will look something like this:
Click on the Flux application to switch to the deployment configuration view. We'll be mostly using the default configuration, but you do need to update the flux.git.url field to replace okteto with your GitHub Username. You might also want to change the value of secret, since this is used to authenticate calls between GitHub and your Flux instance (remember this value, you might need it later).
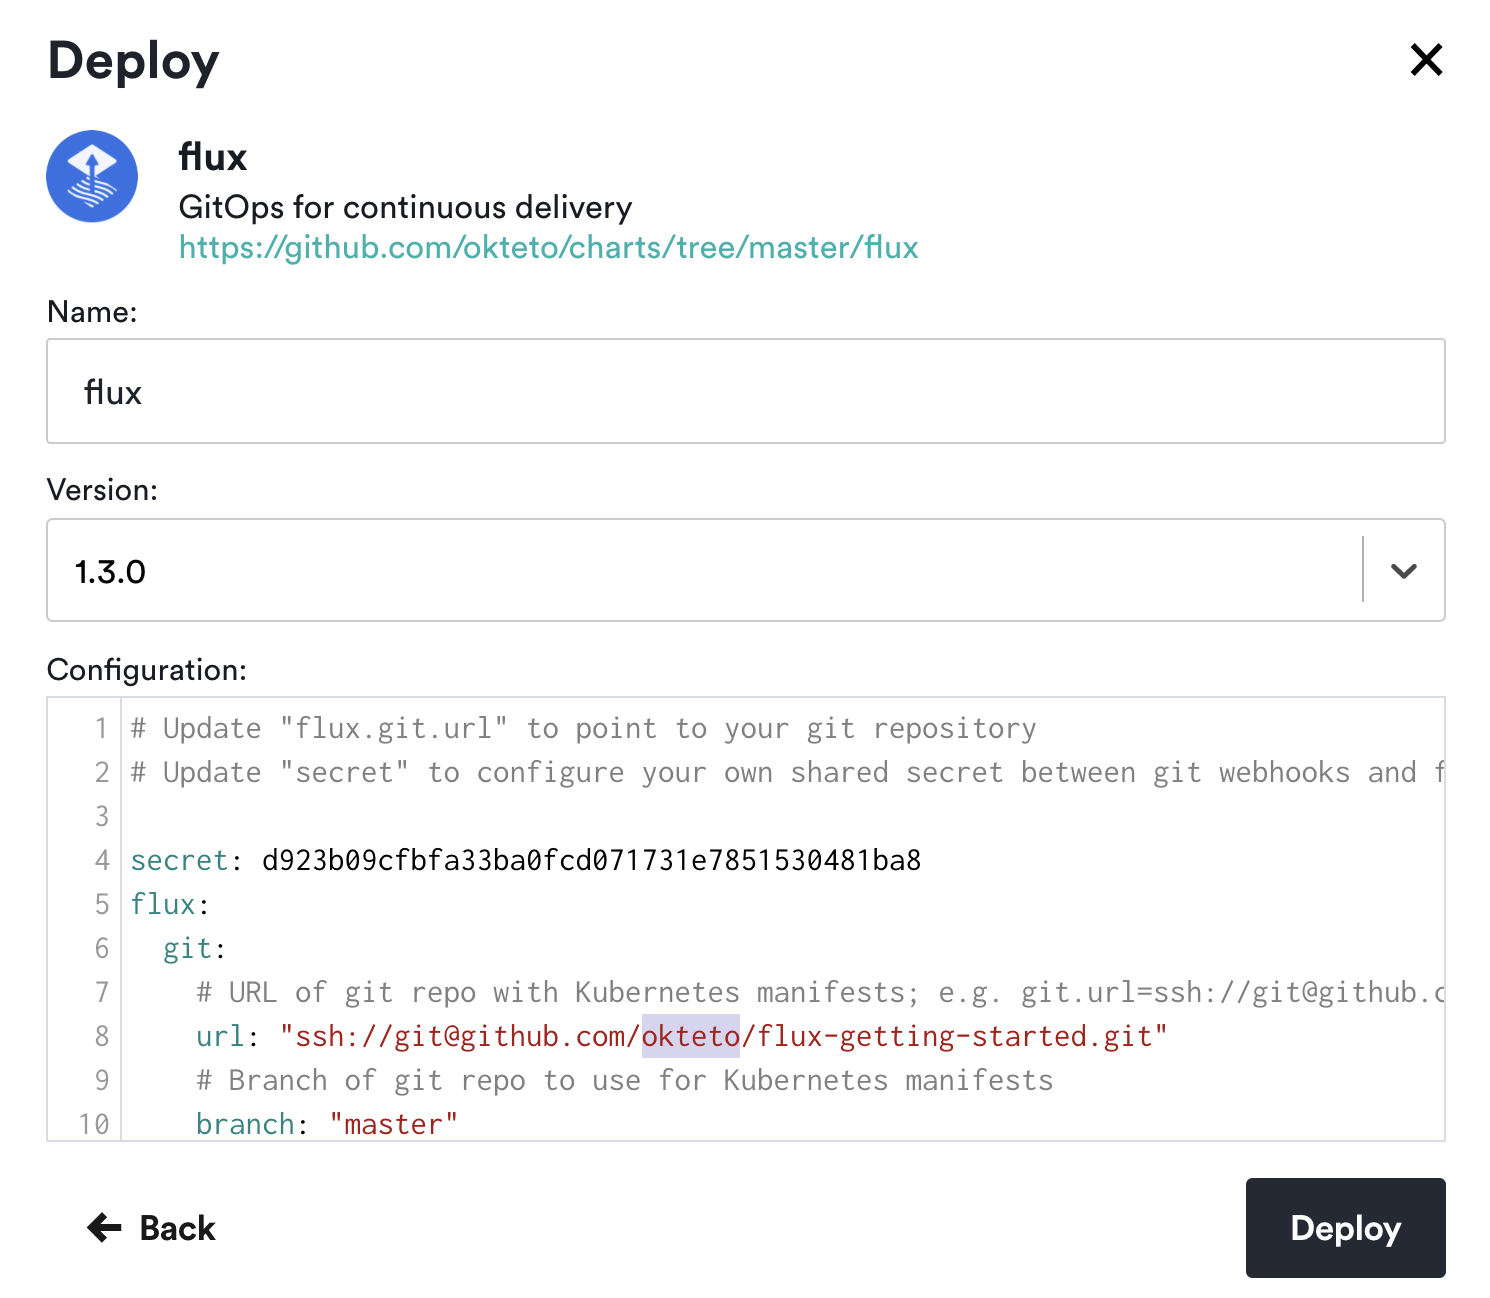
Click on the Deploy button on the bottom of the dialog to launch your Flux instance. Your instance will be up and running in a few seconds.
Give Flux Write Access
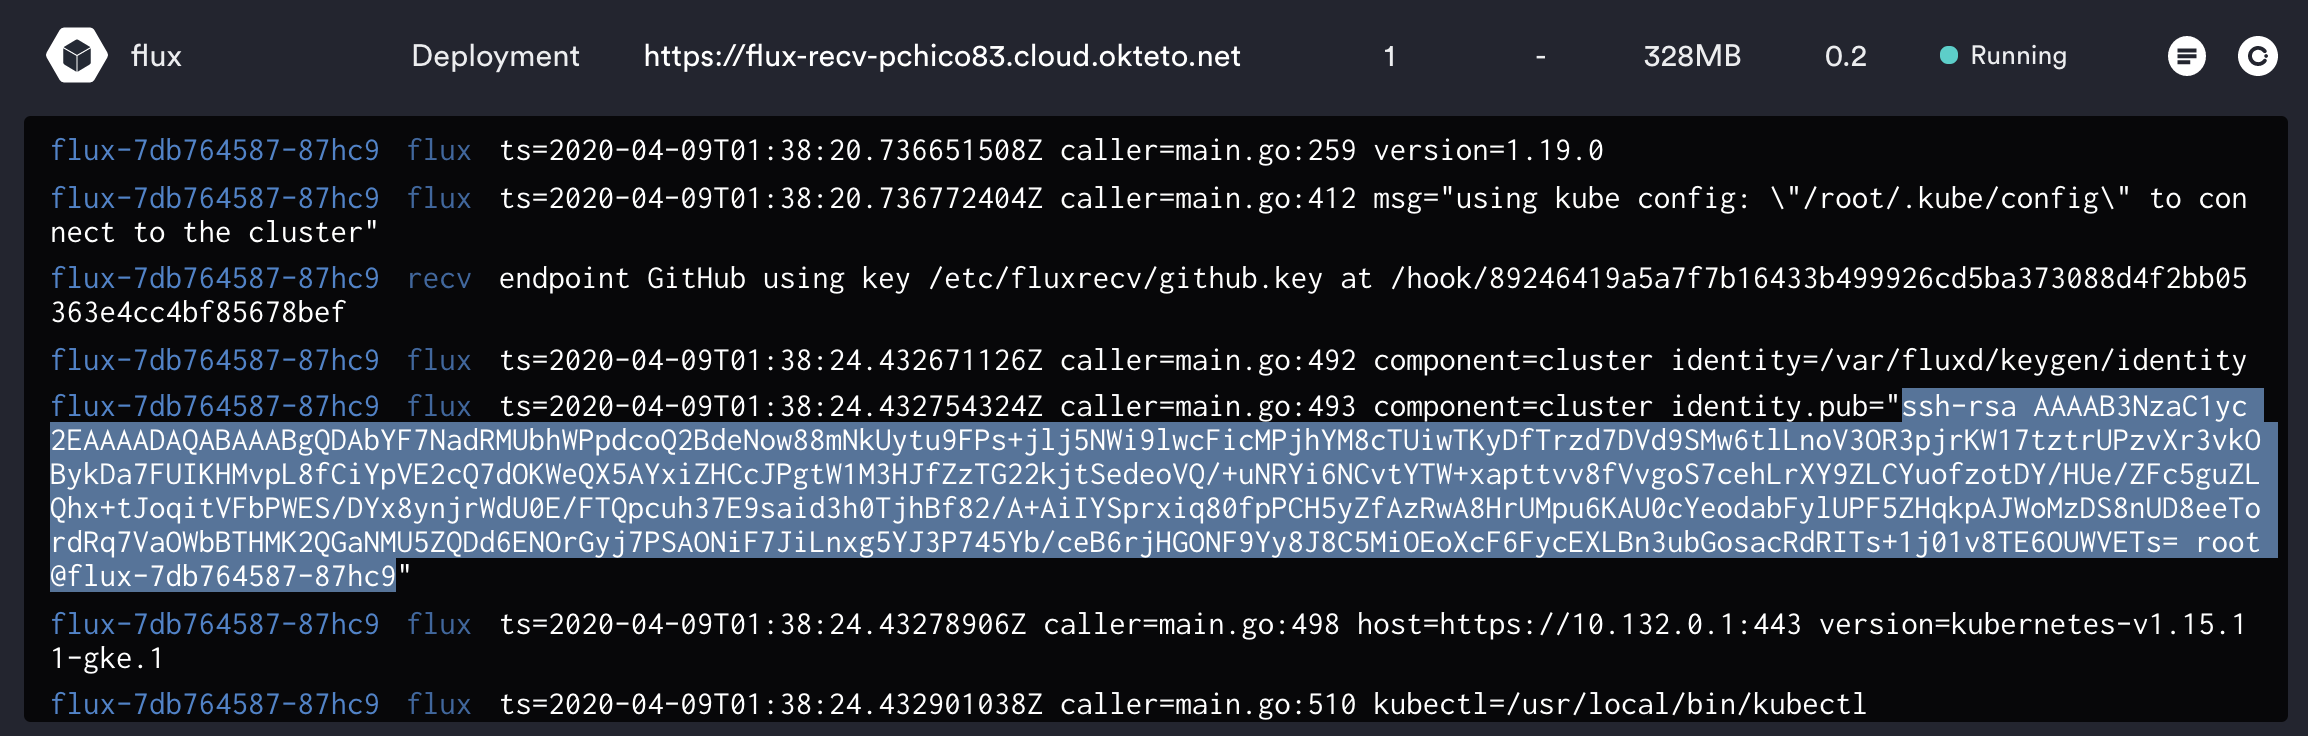
For the real benefits of GitOps, Flux needs access to your git repository to update configuration if necessary. To facilitate that, you need to add a deploy key to your fork of the repository. Flux automatically generates an ssh key pair to access your git repository and prints the public key in the standard output. Find the SSH key by opening the logs of the flux deployment in Okteto Cloud and search for cluster identity.pub.
Navigate to your fork on GitHub, go to Settings > Deploy keys, click on Add deploy key, give it a Title, check Allow write access, paste the Flux SSH key and click Add key.

You can also configure a GitHub webhook using the
secretvalue and the URL printed by the Flux instance logs. Grep forendpoint GitHub using key /etc/fluxrecv/github.key atto obtain it.
Commit a Small Change
flux-getting-started is a simple example in which an api service is deployed. Here we will simply update the namespace and the URL of the repo so Flux picks up the change and deploys the application.
Modify the file releases/dev/hello-world-dev.yaml to replace $YOUR_GITHUB_ID (lines 5 and 12) with your GitHub Username:
apiVersion: helm.fluxcd.io/v1
kind: HelmRelease
metadata:
  name: dev
  namespace: $YOUR_GITHUB_ID
  annotations:
    fluxcd.io/automated: "true"
    filter.fluxcd.io/chart-image: "semver:*"
spec:
  releaseName: dev
  chart:
    git: git@github.com:$YOUR_GITHUB_ID/flux-getting-started
    path: chart
    ref: master
  values:
    replicaCount: 2
    image:
      repository: okteto/hello-world
      tag: 1.0.0
This file is used by Flux to automate your deployments. The important parts are:
filter.fluxcd.io/chart-image: "semver:*"means Flux will only deploy container images tagged with a semantic version. You can also useglobpatterns.spec.chartspecifies the chart to be deployed.spec.valuesspecify thevalues.yamlconfiguration for this automated release.
For more information about this format, check the official documentation.
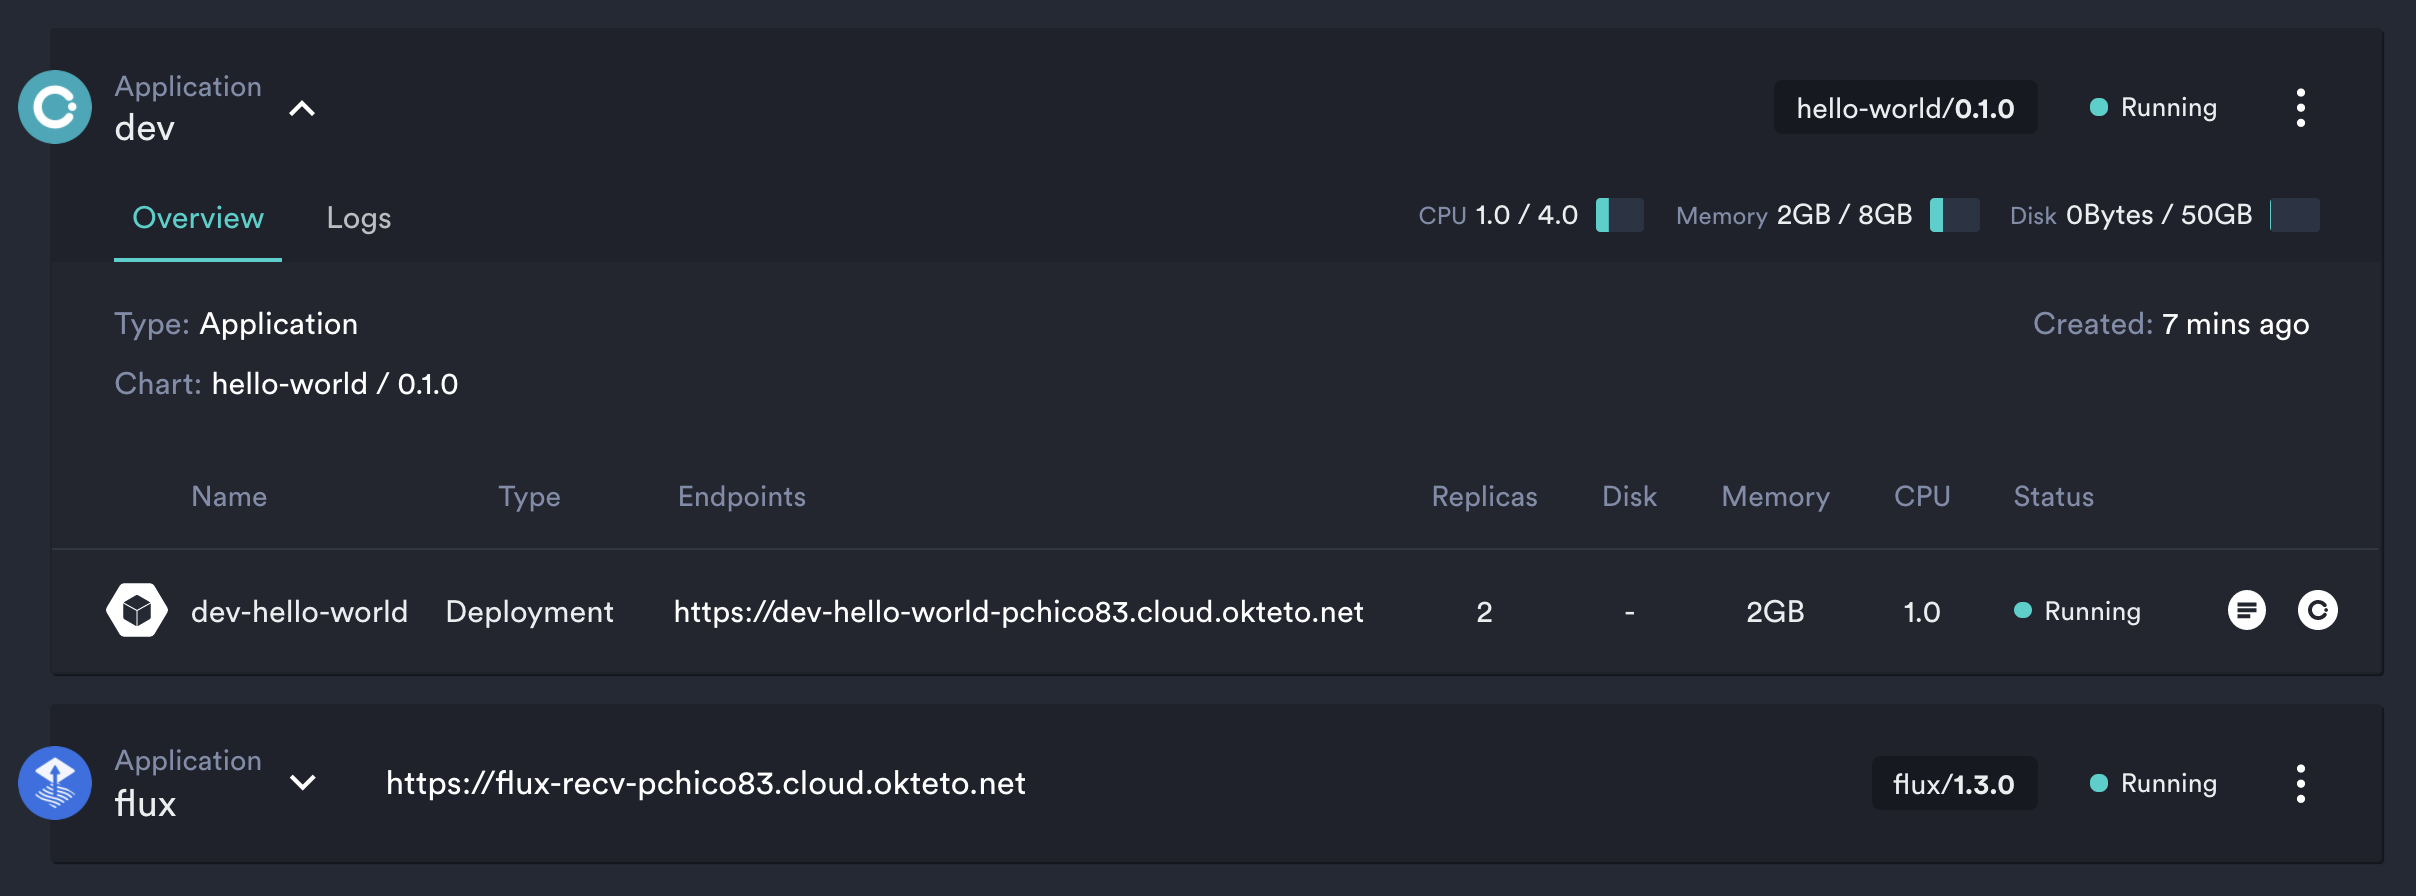
Commit and push your changes to your forked repository. Flux will discover these changes and will automatically deploy your application. Validate if it worked by going to Okteto Cloud and seeing the newly deployed dev application in your namespace (it might take up to a minute).
From this moment, Flux will redeploy your application on each commit on master 🤗.
Automated Deployment of New Container Images
Flux also updates your applications when a new container image is available. With this, your CD pipeline only has to worry about building your images, while Flux takes care of your deployment logic.
For this step, we're going to use Okteto Cloud's Build and Registry services. This will allow us to directly build and push our private images in Okteto Cloud, and not have to deal with credentials and imagePullSecrets.
If you haven’t done it yet, install the Okteto CLI by following this guide, run the context command, and select the Okteto Cloud option:
$ okteto context
Push your private image to the Okteto Registry by executing the following command:
$ okteto build -t okteto.dev/hello-world:1.0.0
Modify the file releases/dev/hello-world-dev.yaml to use the image we just built ( line 18):
apiVersion: helm.fluxcd.io/v1
kind: HelmRelease
metadata:
  name: dev
  namespace: $YOUR_GITHUB_ID
  annotations:
    fluxcd.io/automated: "true"
    filter.fluxcd.io/chart-image: "semver:*"
spec:
  releaseName: dev
  chart:
    git: git@github.com:$YOUR_GITHUB_ID/flux-getting-started
    path: chart
    ref: master
  values:
    replicaCount: 2
    image:
      repository: okteto.dev/hello-world
      tag: 1.0.0
Commit and push your changes to your forked repository. Flux will detect the new image and automatically redeploy your application using your private image.
Now let's see how Flux automatically redeploys your application when pushing a new tag to the Okteto Registry. Open the file main.go and modify the response message on line 17 to be Hello world from Okteto!.
func helloServer(w http.ResponseWriter, r *http.Request) {
	fmt.Fprint(w, "Hello world from Okteto!")
}
Instead of committing our changes, we are just going to build and push a new image tag with our code changes:
$ okteto build -t okteto.dev/hello-world:1.0.1
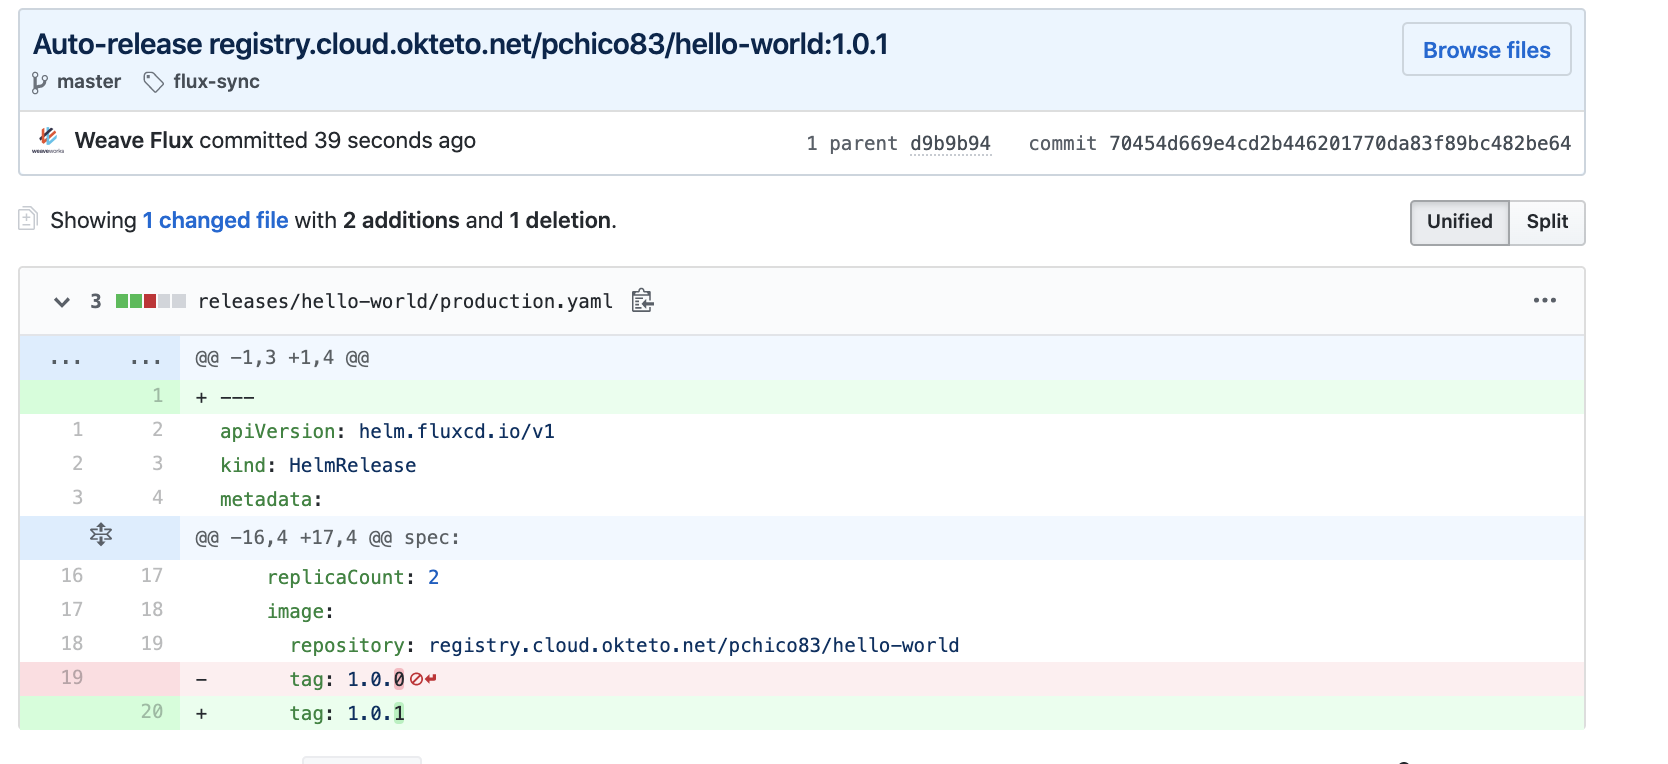
Wait for a minute or so and reload the endpoint of your application again. Your changes were automatically applied! Now go to the commits list in your forked repository on GitHub. Notice how Flux also committed these changes to your git repository, keeping everything up to date.
Conclusions
GitOps makes incredibly simple to deliver your applications using the standard git-flow while taking advantage of your platform automation. We are thrilled about the new scenarios that GitOps enables for our users, and integrating Flux in the Okteto Cloud Application Catalog is just the beginning. Give it a try and you will also get fascinated by the GitOps delivery experience 💥.
We would ❤️ to hear what you think about our Flux integration on Okteto Cloud. You can reach us on Twitter, or in our #okteto channel in the Kubernetes community Slack to share your feedback.


 Arsh Sharma