How to Develop Docker Compose Applications Remotely with Okteto Cloud

Local development with docker-compose has proved to be easy as applications are easily spun off with one command irrespective of the operating system. However, running docker-compose tends to slow down your machine, and requires an active docker session.
Remote development with Okteto doesn't require an active docker session. Instead, we provide you a persistent volume, instant file synchronization, and an accessible public endpoint to view your application changes as you develop your application locally.
In this blog post, you'll see how Okteto makes it easier to develop Docker Compose applications. You'll learn how to deploy a remote development environment, cache dependencies, and hot-reload your code while developing your application directly on Okteto Cloud.
Prerequisite
In order to follow this tutorial, you should have: - An Okteto Cloud account - The Okteto CLI installed - Basic knowledge of Golang
Step 1: Deploy the Golang sample app
For this post, you'll be deploying an application built in our previous post to learn how Okteto speeds up your development cycle. In your terminal, run the command to clone the repository:
$ git clone https://github.com/okteto/go-api-docker-compose
$ cd go-api-docker-compose
The docker-compose.yml present in the folder contains the list of services and volumes to be created when deployed. Deploy the application from your terminal:
$ okteto stack deploy
Step 2: Activate your development container
The next step is to spin up a development container on the Okteto platform. The development containers are isolated deployments that render changes made locally instantly by synchronizing your files and folders locally.
The first step is to create an Okteto manifest file. The Okteto manifest file will contain the configuration required to create a development environment. Run the command to initialize a manifest file:
$ okteto init
The command walks you through the process of setting up your Okteto manifest. The first step is to create an okteto.yml file:
okteto manifest (okteto.yml) doesn't exist, do you want to create it? [y/n] y
Next, select the deployment in your cluster that you want to develop. Select the deployment web we deployed earlier:
Select the deployment you want to develop:
  ▸ web
  Use default values
Click on the Enter button to finalize the process. The okteto.yml file created contains configuration from the values you chose in the interactive process:
name: web
image: okteto/golang:1
command: bash
securityContext:
  capabilities:
    add:
      - SYS_PTRACE
volumes:
  - /go/pkg/
  - /root/.cache/go-build/
sync:
  - .:/usr/src/app
forward:
  - 2345:2345
  - 8080:8080
In the manifest file above, you have:
name: The name of the deployment you want to put in development mode.image: The base image by this development container. In this case, a golang image from the Okteto registry.command: the start command of the development container. This means you can run every command you usually run on your local terminal in the development terminal.securityContext:SYS_PTRACEis a capability required by the Go debugger.volumes: a list of paths in your development container to be mounted as persistent volumes. For example, this is useful to persist the Go cache.sync: The folders that will be synchronized between your local machine and the development container.- Two ports forwarded:
- The port
2345:2345is used for debugging, and - The port
8080:8080is the port listened to by your development container. This means your application should start on the port8080.
- The port
Next, activate your development container:
$ okteto up
 ✓  Persistent volume successfully attached
 ✓  Images successfully pulled
 ✓  Files synchronized
    Context:   cloud_okteto_com
    Namespace: youngestdev
    Name:      web
               2345 -> 2345
               8080 -> 8080

Welcome to your development container. Happy coding!
youngestdev:web app>
The okteto up command starts a development container, which means:
- A file synchronization service is created to keep your changes up-to-date between your local filesystem and your development container.
- Container port 8080 ( the application ) and 2345 ( the debugger ) is forward to localhost.
- A remote shell is started in your development container to enable you build, test, and run your applications as if you were in your local machine.
In your remote shell, run the command to download and update the applications' dependencies:
$ app > go mod tidy
Start your application with the command:
$ gin --appPort 8080 --all -i run main.go
The command above starts your application using gin. Unlike the traditional go build command where you have to build first and then run the binary file, gin reloads your application on every change made to your application.
[gin] Listening on port 3000
[gin] Building...
[gin] Build finished
Starting the application on port 8080
Okteto automatically forwards port 8080 from your local computer to the development container, making it accessible via localhost. Test your application by running the command below in your terminal:
$ curl localhost:8080/
404 page not found
The response above signifies that there's no route handling the "/" route. Let's change that.
Similarly, a public endpoint for accessing your development environment is automatically generated, and can be retrieved from your dashboard:
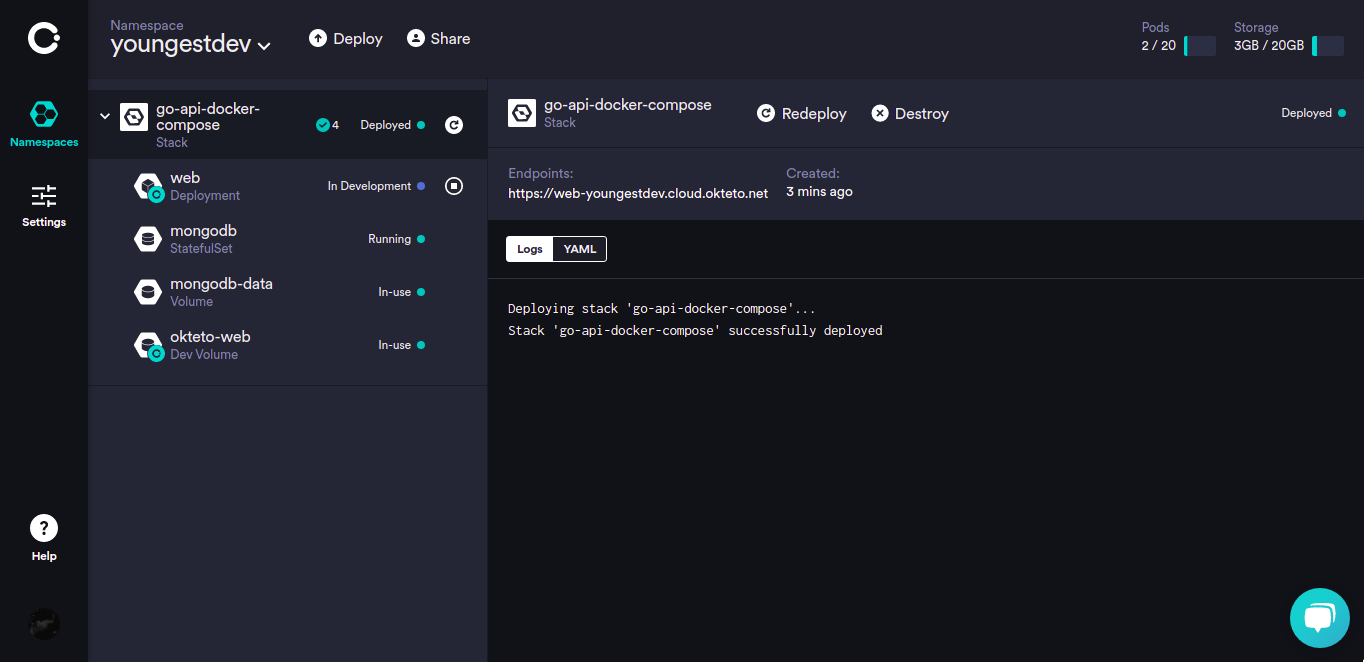
The public endpoint is accessible by anyone, and comes in handy when you want to share your application with someone else.
Verify that your public endpoint works:
$ curl https://web-youngestdev.cloud.okteto.net/
404 page not found
Step 4: Develop directly in Okteto Cloud
Open the main.go file in your favorite IDE and add a handler for the "/" route. Just above the AddFood function, add the following:
func Welcome(response http.ResponseWriter, request *http.Request) {
    fmt.Fprint(response, "Welcome to my application from the development container")
}
In the main function, just above the last line of code, register the function as route handler on line 10:
func main() {
    fmt.Println("Starting the application on port 8080")
    ctx, _ := context.WithTimeout(context.Background(), 10*time.Second)
    clientOptions := options.Client().ApplyURI("mongodb://mongodb:27017")
    client, _ = mongo.Connect(ctx, clientOptions)
    router := mux.NewRouter()
    router.HandleFunc("/food", AddFood).Methods("POST")
    router.HandleFunc("/food", GetFoods).Methods("GET")
    router.HandleFunc("/food/{id}", GetFood).Methods("GET")
    router.HandleFunc("/", Welcome).Methods("GET")
    http.ListenAndServe(":8080", router)
}
Okteto will synchronize your changes to your development container and gin automatically detects them and reloads your application. Call your application from a terminal to validate the changes:
$ curl https://web-youngestdev.cloud.okteto.net/
Welcome to my application from the development container
Step 5: Pushing your changes and redeploying
To effect the changes made during the development process in the original deployment, start by exiting the development container using the commands: Ctrl + C and Ctrl + D.
Push the changes made to the deployment using:
$ okteto push
The okteto up command builds a new image of your application and then deploys it on Okteto.
 i  Development container deactivated
 i  Running your build in tcp://buildkit.cloud.okteto.net:1234...
 ✓  Source code pushed to 'web'
Conclusion
In this article, you learned how Okteto Cloud makes it easier to develop your Docker Compose applications by moving your development environment to the cloud. Instead of slowing your machine down by having to run a lot of components locally, you can instead deploy everything on Okteto Cloud by simply running okteto stack deploy.
By using the okteto up command, you're able to instantly view the changes made in your application from your local machine without having to make new deployments.
By using the okteto push command, a container for your application is built containing the changes made during development. This command can be used subsequently to push new updates to your deployments in Okteto.


 Arsh Sharma

 Mercy Bassey