Deploying An Existing Application Using Okteto Cloud

Fast deployment of applications is an attribute Okteto boasts of. The deployment of applications from the Okteto dashboard is easy and fast as it requires one click on the deploy button without having to deal with the complexities of CLIs, manifests, etc. Applications deployed in Okteto are automatically secured using HTTPs and can be tested, shared, and used by the public.
In the previous blog post, you learned how to build a FastAPI CRUD application and deployed it to Okteto using the Okteto CLI tool. In this tutorial, you will be learning how to deploy the application directly from your Okteto dashboard.
Initial Setup
Start by creating a fork of the application from GitHub and then clone it locally. In your local clone, set it up using the following commands:
$ cd fastapi-crud
$ python3 -m venv venv && source venv/bin/activate
(venv)$ pip install -r requirements.txt
Verify that the setup is complete by running:
python3 main.py
Initial Deployment
In the previous post, you defined an Okteto stack file to facilitate the deployment of your application from the CLI tool. In this section, you will be deploying the application from the dashboard.
However, before deployment, you need to reassign the repository where Okteto will store your application images.
Your current okteto-stack.yaml file is similar to the code below:
services:
  fastapi:
    image: DOCKERHUBUSERNAME/fastapi-crud:latest
    build: .
    replicas: 1
    ports:
      - 8080:8080
    resources:
      cpu: 100m
      memory: 128Mi
On line 5, modify the image value from:
image: DOCKERHUBUSERNAME/fastapi-crud:latest
to:
image: okteto.dev/fastapi-crud:latest
In the code block above, you renamed the storage location of your application's image from your dockerhub to Okteto's repository.
What's the okteto.dev repository ?
The okteto.dev repository is a container registry hosted in Okteto Cloud that allows every user to have its own space to store its container images. It's fully integrated with the rest of Okteto. In the previous post, we were using Docker Hub. Here, we are switching to Okteto's so our application deploys faster, and with fewer external dependencies.
Next, save the changes and commit the changes to GitHub:
(venv)$ git add okteto-stack.yaml
(venv)$ git commit -m "Update image repository"
(venv)$ git push
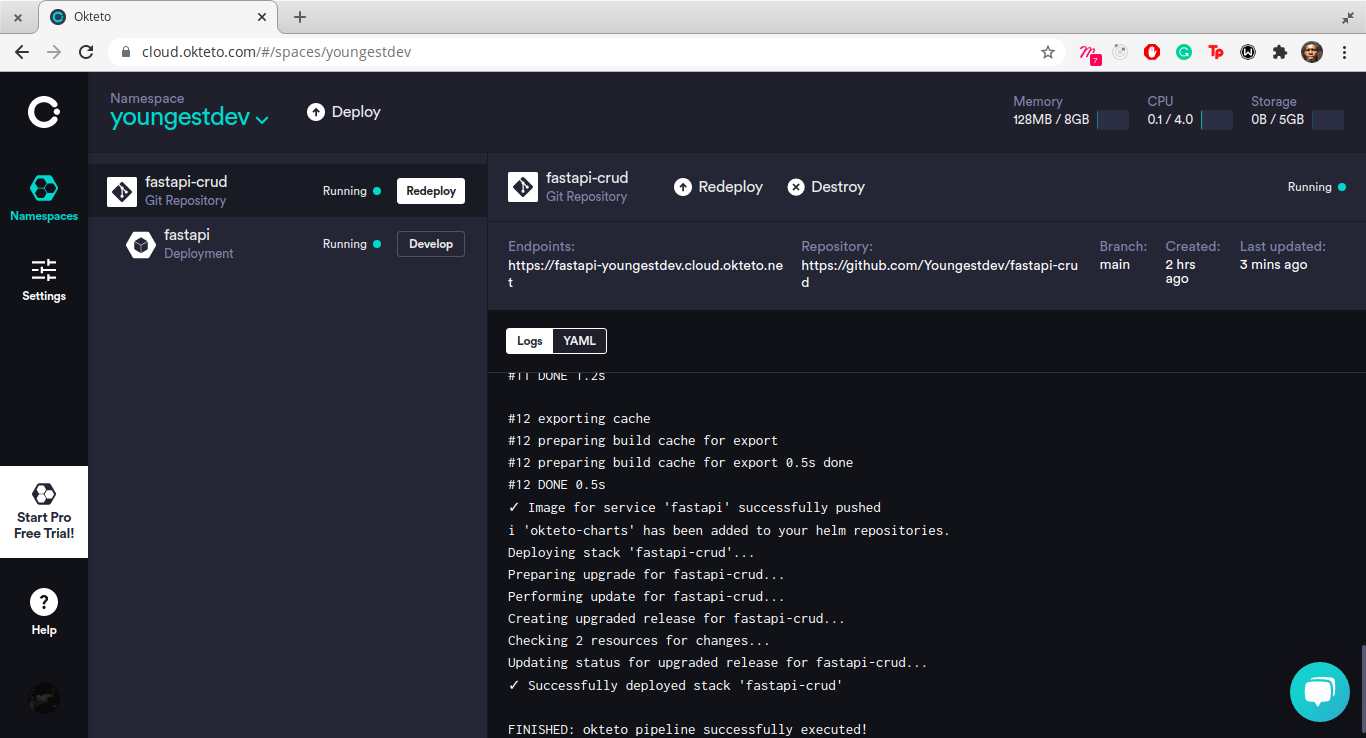
With the stack file updated, proceed to your Okteto dashboard to deploy the application:
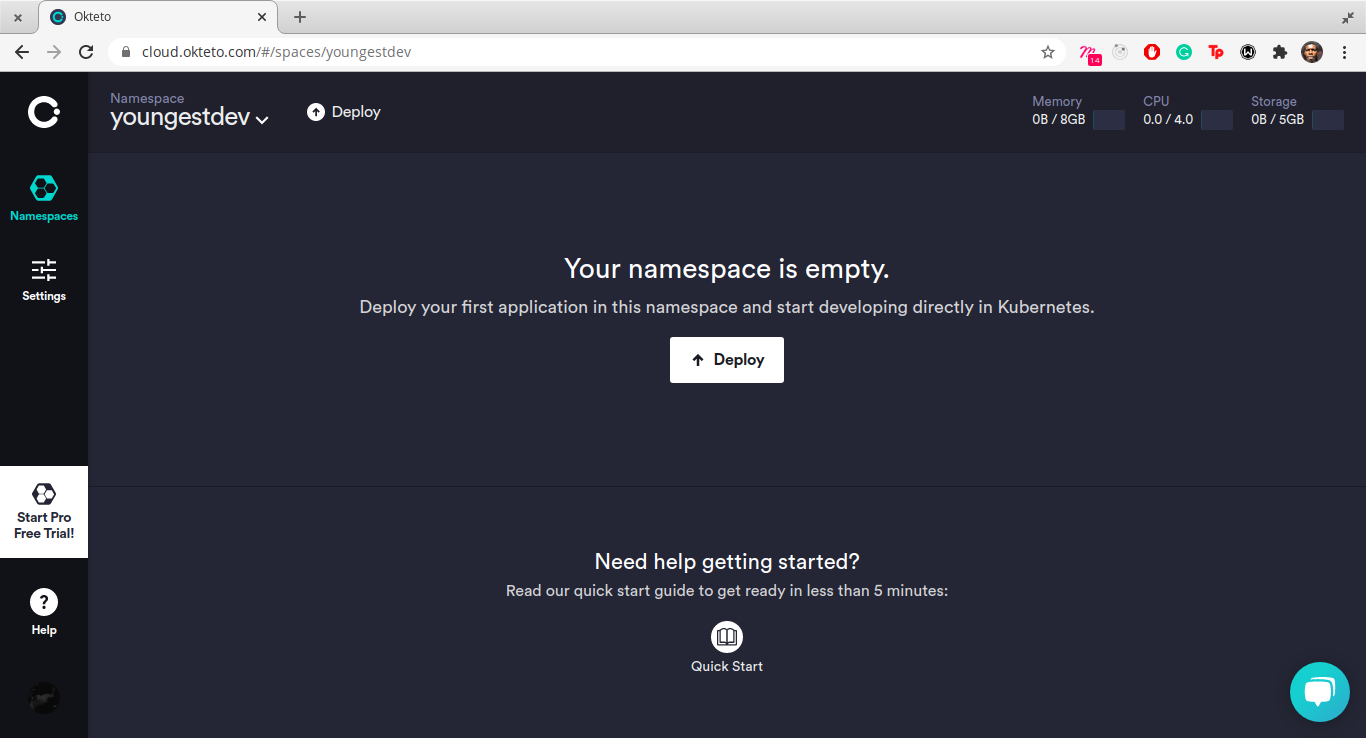
Click on the Deploy button. A popup will appear, fill in the Repository URL and optionally, the branch name (here we are using main).
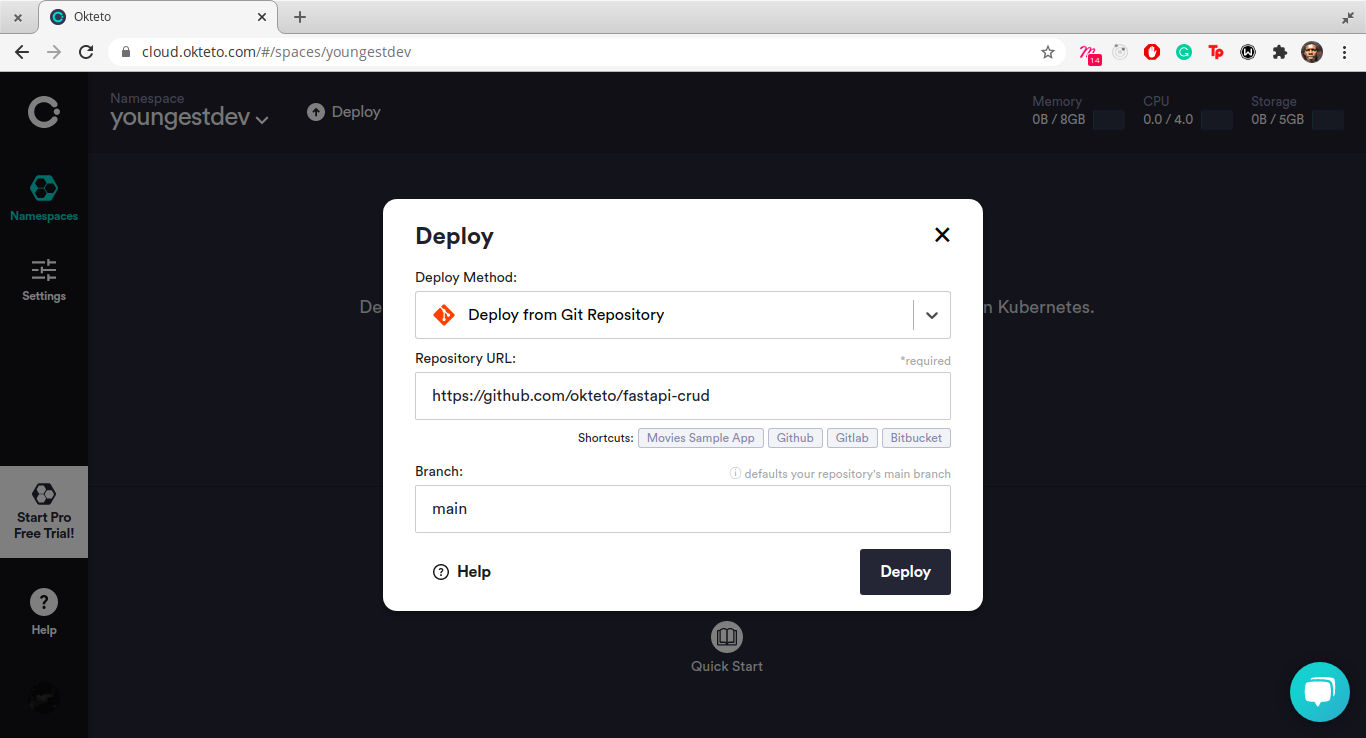
Next, click on the deploy button. Okteto automatically retrieves, builds, deploys, and starts your application.
Adding A New Route
Let's update the application by adding a route for adding bulk recipes.
Open app/api.py with your favorite editor and add another route just below the POST route. Start by importing the List wrapper from typing before adding the new route:
from typing import List

...

@app.post("/recipes", tags=["Recipe"])
def add_bulk_recipe(bulk_recipe: List[RecipeSchema] = Body(...)) -> dict:
    for recipe in bulk_recipe:
        recipe.id = len(recipes) + 1
        recipes.append(recipe.dict())

    return {
        "message": "Recipes added successfully"
    }
Test the new route from your terminal:
(venv)$ curl --request POST \
  --url http://0.0.0.0:8080/recipes \
  --header 'Content-Type: application/json' \
  --data '[
	{
		"name": "Donuts",
		"ingredients": [
			"Flour",
			"Milk",
			"Sugar",
			"Vegetable Oil"
		]
	},
	{
		"name": "Creamy Donuts",
		"ingredients": [
			"Flour",
			"Milk",
			"Sugar",
			"Vegetable Oil",
			"Irish whipped cream"
		]
	}
]'
You will get a response similar to the one below:
{
  "message": "Recipes added successfully."
}
Commit the new change in the app/api.py file into a new branch:
(venv)$ git checkout -b bulk-recipes && git add app/api.py
(venv)$ git commit -m "Add bulk recipes"
(venv)$ git push -u origin bulk-recipes
Verify that the new branch is available in your GitHub repo before going to the next step.
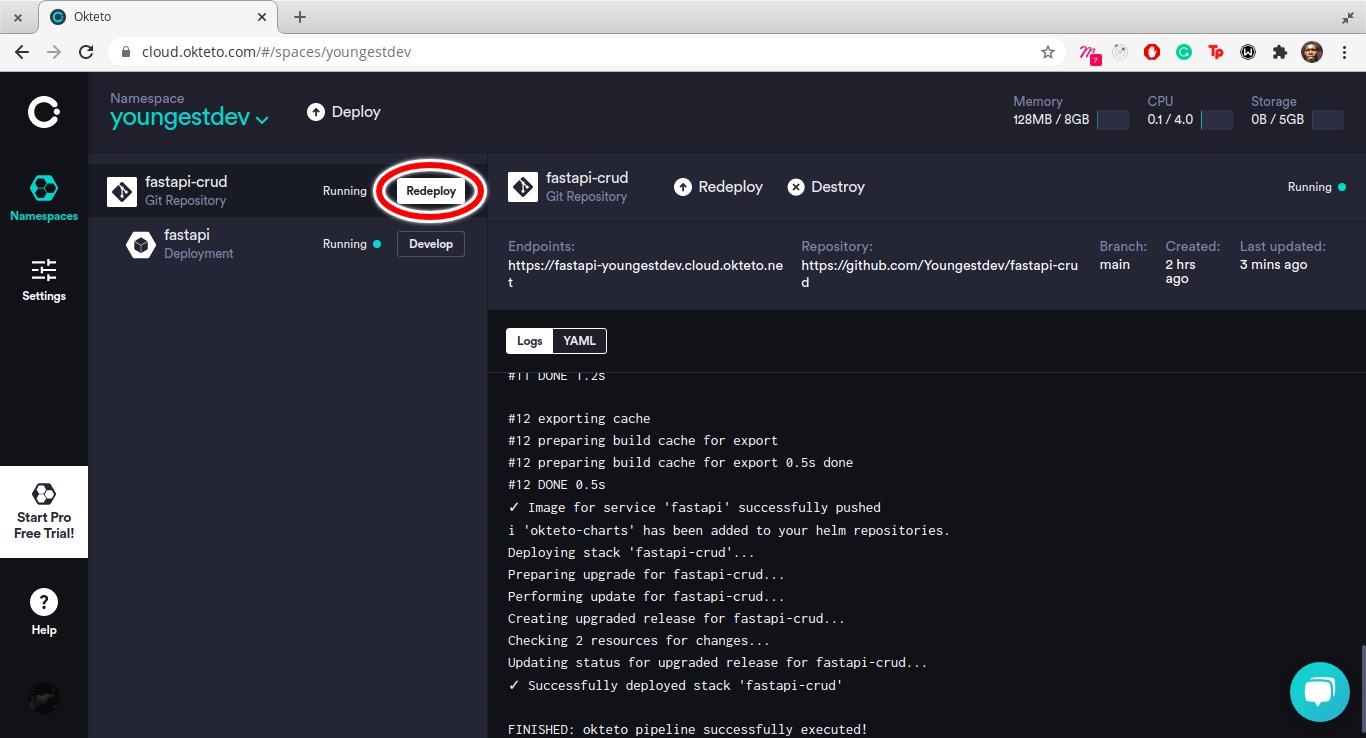
Redeploying
Once again, login into your Okteto dashboard and click on the redeploy button:
Change the branch from main to bulk-recipes and deploy:
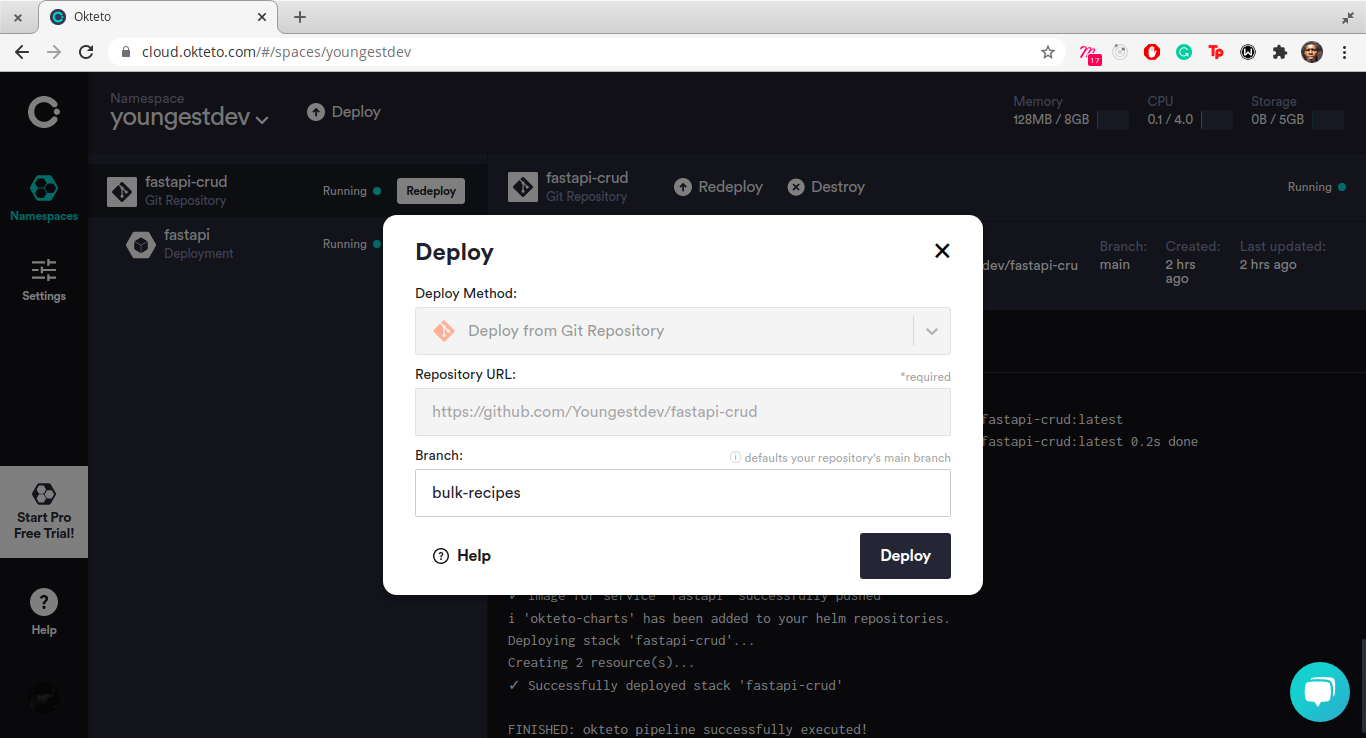
You can see the branch you selected in the dashboard. When redeploying, Okteto will retrieve the latest changes from the branch, rebuild your application's containers (using the Okteto build service) and redeploy your application.

Test the new route by replacing deployedapp from previous requests with the live application url. From your terminal, run the command:
(venv)$ curl --request POST \
  --url https://deployedapp.cloud.okteto.net/recipes \
  --header 'Content-Type: application/json' \
  --data '[
	{
		"name": "Donuts",
		"ingredients": [
			"Flour",
			"Milk",
			"Sugar",
			"Vegetable Oil"
		]
	},
	{
		"name": "Creamy Donuts",
		"ingredients": [
			"Flour",
			"Milk",
			"Sugar",
			"Vegetable Oil",
			"Irish whipped cream"
		]
	}
]'
You will get a response similar to the one below:
{
  "message": "Recipes added successfully."
}
Conclusion
In this article, you deployed an application directly from the Okteto dashboard and redeployed another new branch application version. The deployment was done with minor changes to the Okteto stack file, demonstrating the adaptability of the Okteto stacks. Additionally, Okteto can perform the deployment from different branches from the CLI tool. You can find the code from this article on GitHub
Get started with Okteto for free today to begin deploying your application in one click.


 Arsh Sharma